DIY 90° Corner Clamp Jigs — Printable Plans
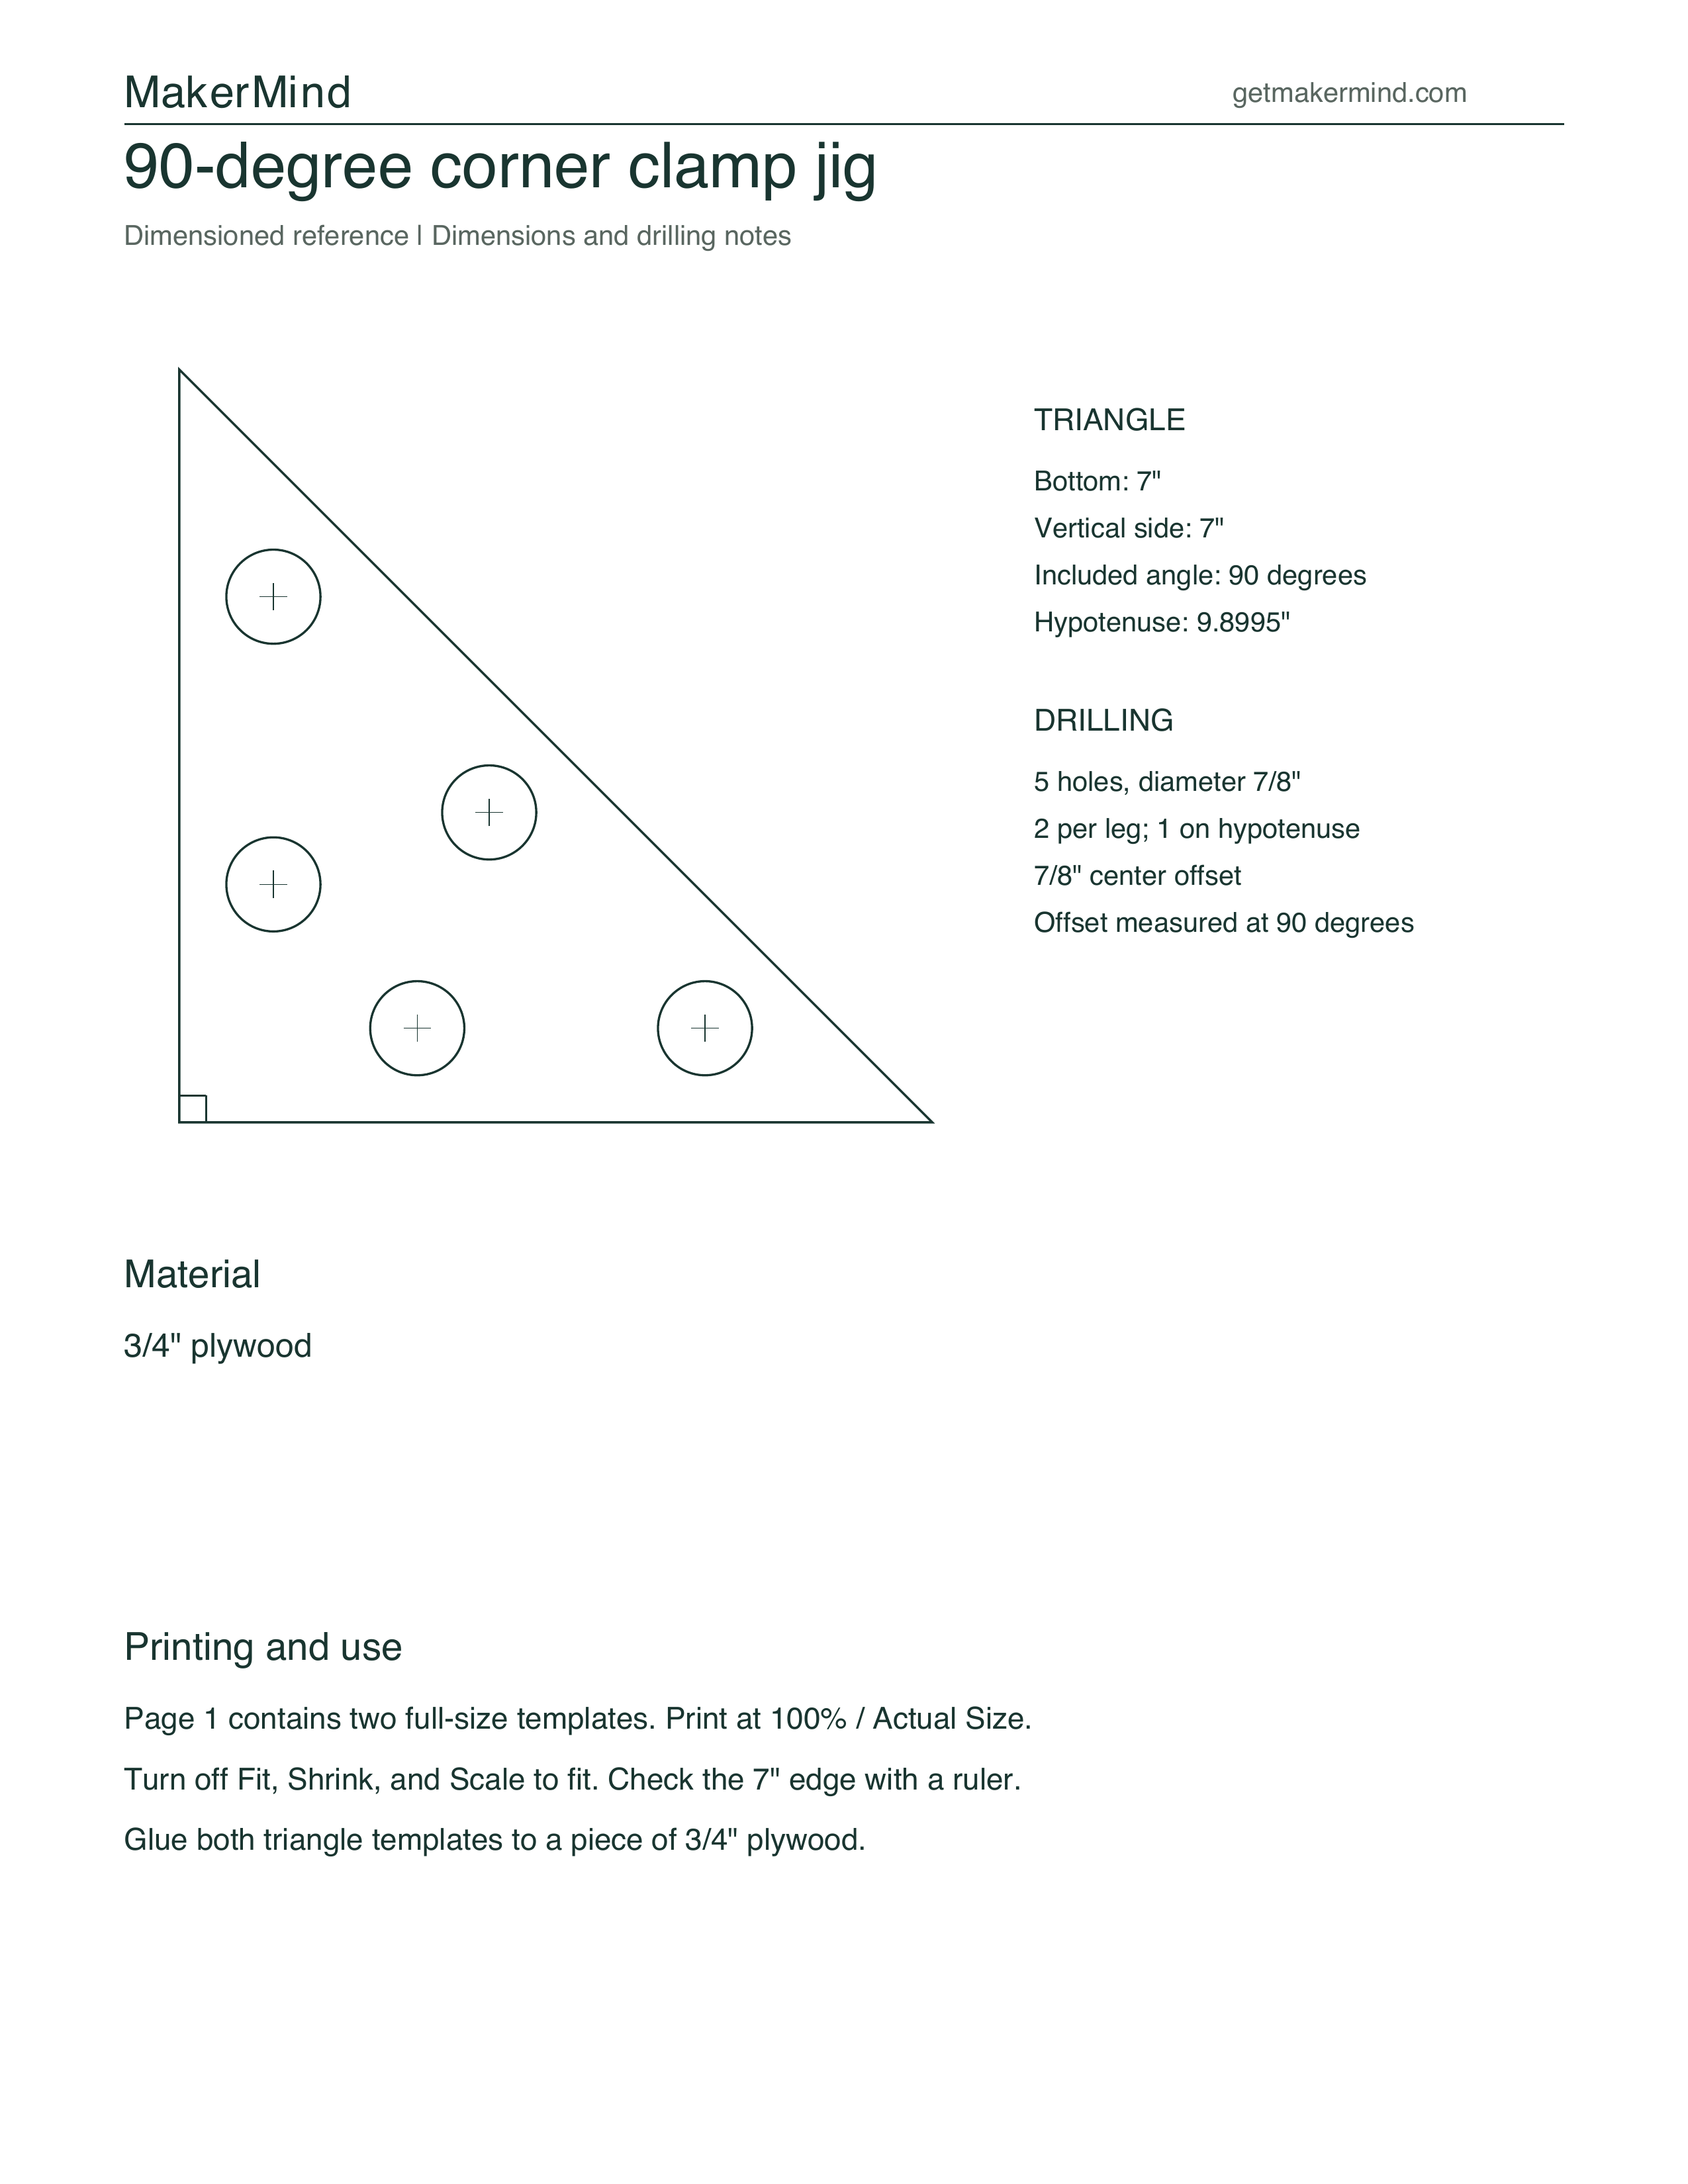
Build a pair of 90° corner clamp jigs from 3/4″ plywood to help hold workpieces square during assembly. Each jig has 7″ sides and five clamp-access holes. Includes two full-size printable templates and step-by-step instructions.
Woodworking · Beginner · 2–3 hours
Tools
- Tape Measure
- Speed Square
- Pencil
- Drill
- Sandpaper
- Miter Saw
- Clamps
- 7/8″ Forstner bit
- Printable template
Materials
- 3/4" plywood
- glue stick
Cut list
- 3/4" plywood blank — 1 × 7.25 in x 7.25 in x 3/4 in before diagonal cut 3/4" plywood
Diagrams
Build steps
Prepare and attach the templates
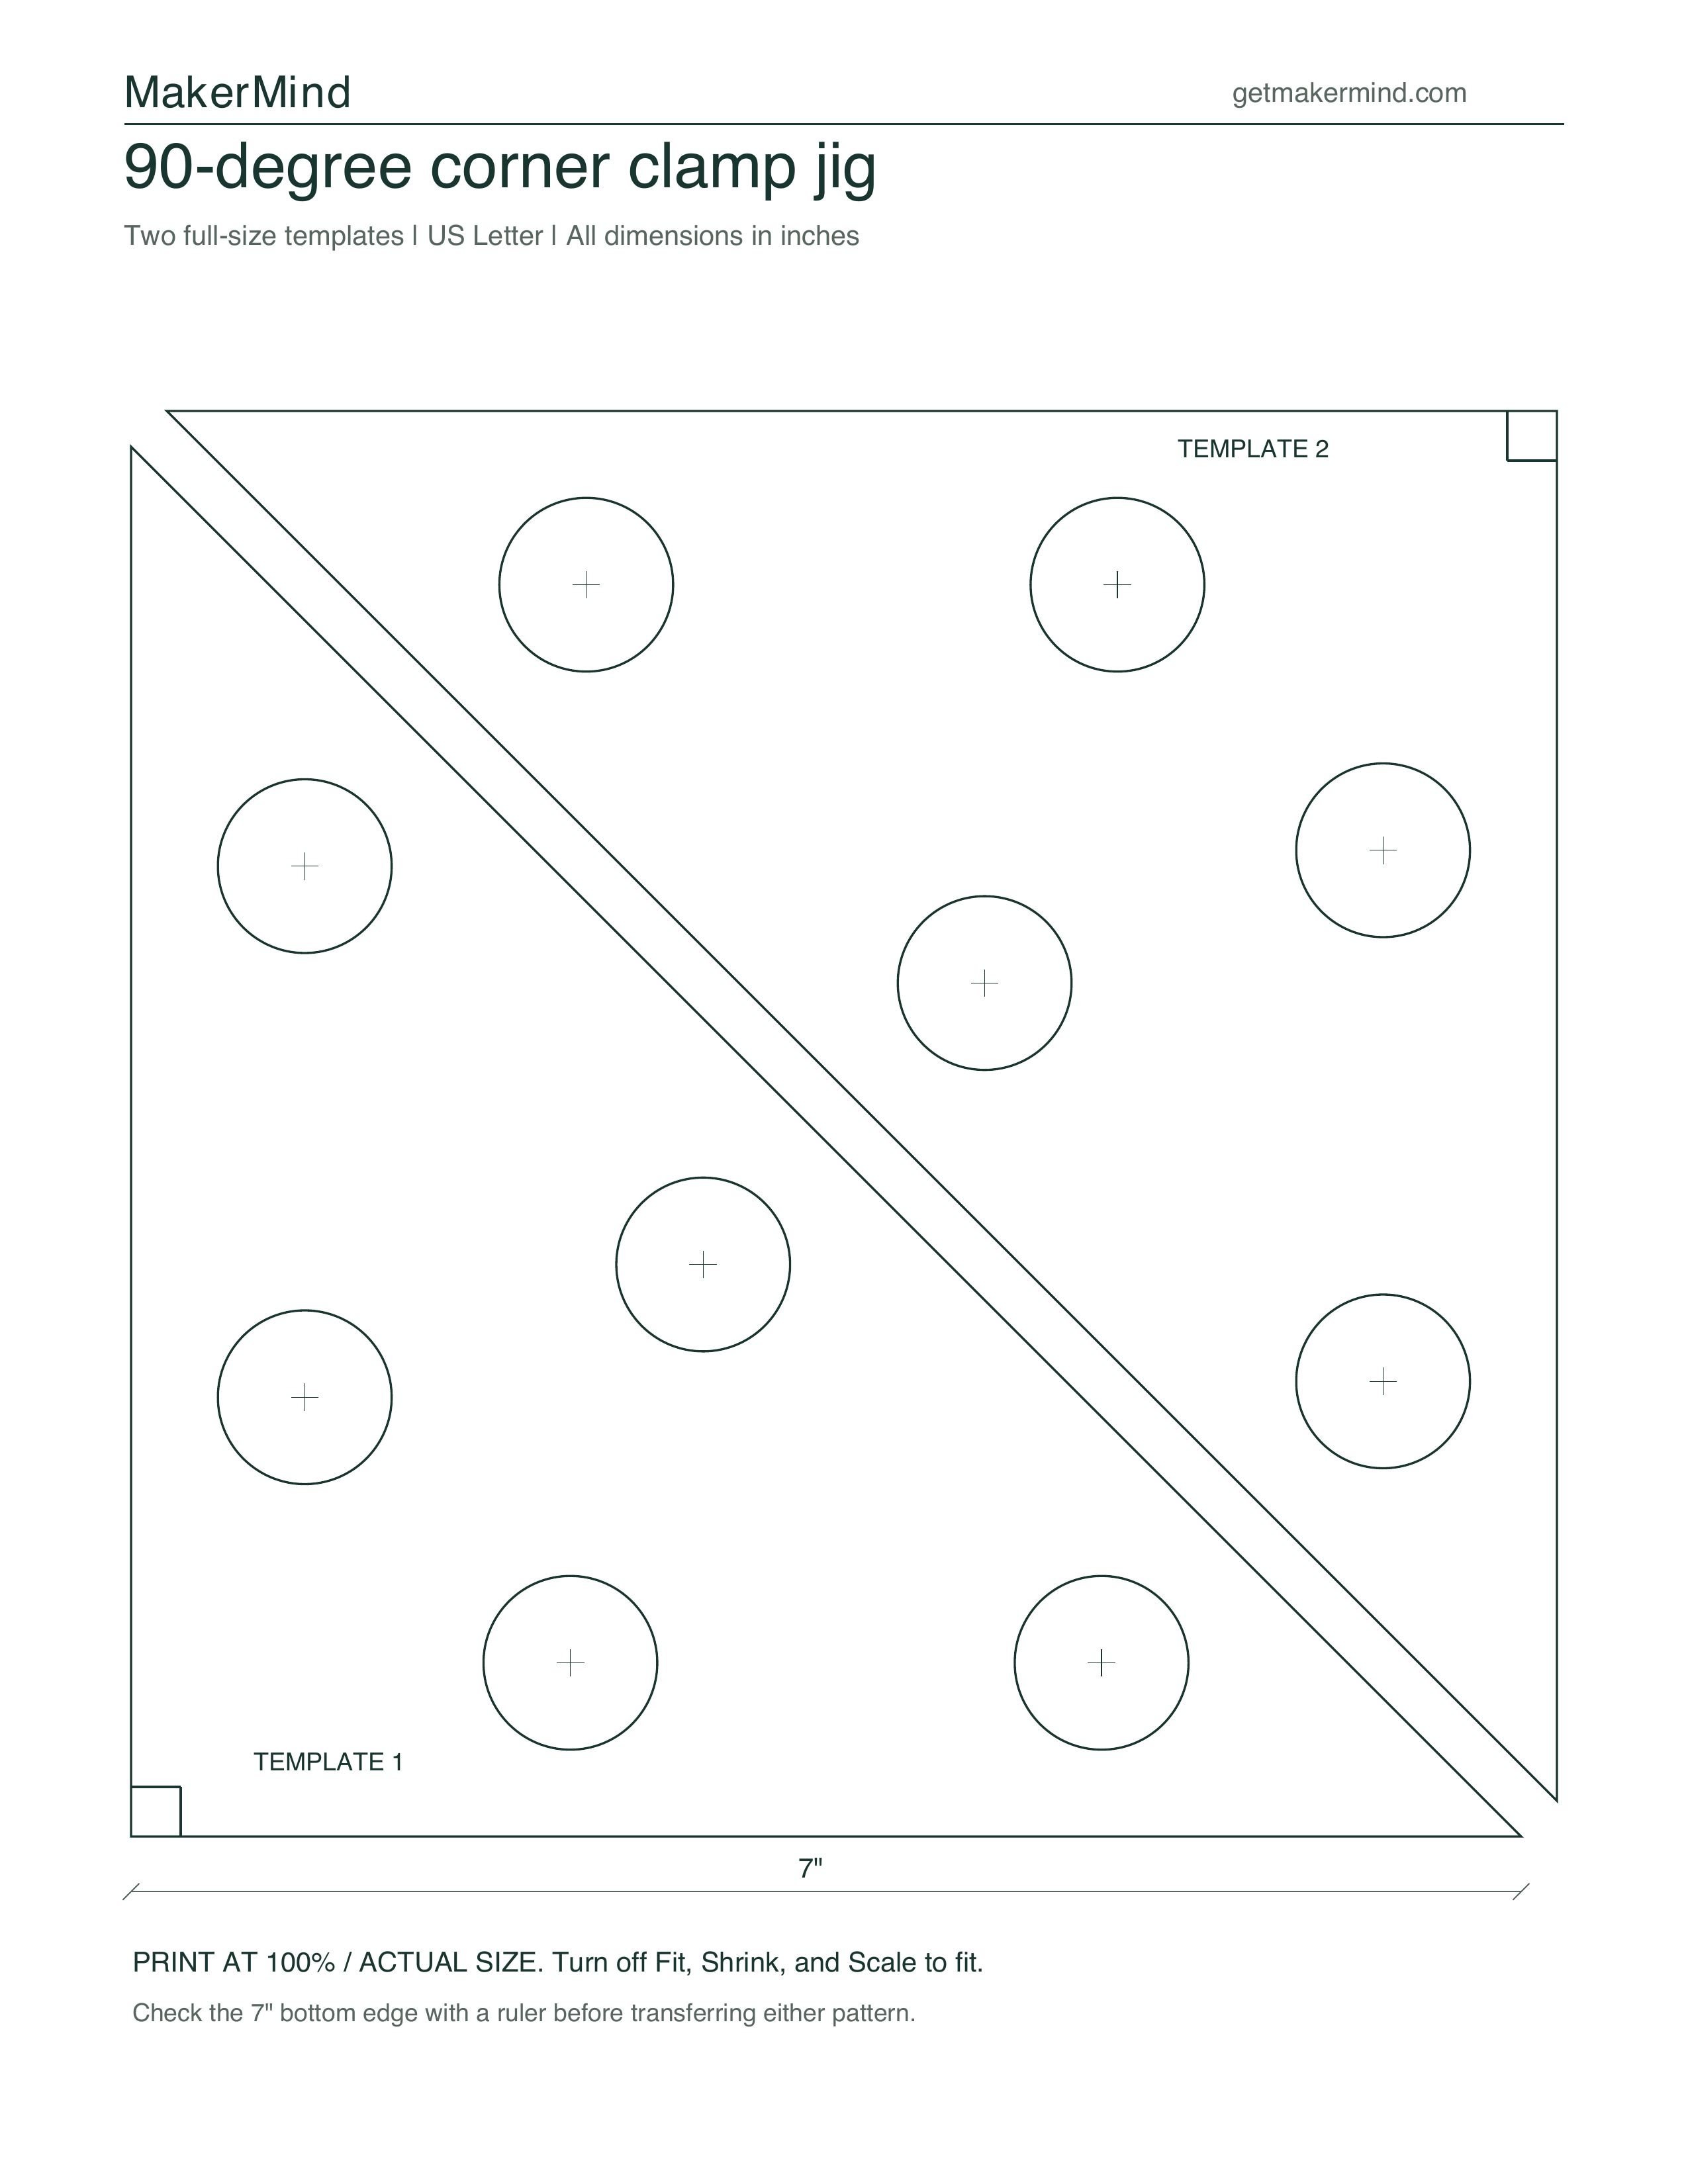
Start by finding a piece of plywood slightly bigger than 7.25 in x 7.25 in. Print the template. Use a glue stick to adhere the paper to the plywood, press down firmly. Print the template sheet at 100% / Actual Size. Measure the labeled 7-inch edge before attaching it to the plywood. Make sure you line up the outer and bottom triangle lines on the corner of one side. this will make cutting a simpler process
Drill out holes
Using a 7/8" forstner bit, drill out all 10 total holes. Ensure you place a sacrificial board under to prevent tear out on the back side. Clamp the panel securely before drilling.
Cut out triangles
Cut out both triangles carefully. if the template is well lined up with the edge cut the middle 45 degree angle out first. once the angle is cut, trim both square sides to the template lines adjust cut to ensure squareness. this is important to the jig's accuracy.
Remove template
peel the paper template off, if it does not peel cleanly sand it off using 120 grit paper. Lightly ease the hole edges. sand both triangles and sides to your desired preference.
Use your new corner clamps
by placing the fixed jaw of a clamp inside the holes you can now hold workpieces at the intended angle; verify alignment with a square before tightening. depending on your project you may need more than 2 corner clamps. 1-2 are recommended in each corner of an assembly. Thanks for building smarter with MakerMind!
Safety notes
- Wear safety glasses, hearing protection, and appropriate respiratory protection when cutting, sanding, routing, or machining materials.
- Read the entire project plan and confirm all measurements, material sizes, and tool setups before beginning any cuts or assembly.
- Always follow manufacturer safety instructions and use proper safety equipment such as push sticks, guards, clamps, and stable work supports.
- Never operate tools while fatigued, distracted, or under the influence, and seek supervision or assistance when using unfamiliar tools or techniques.
- MakerMind provides informational project guidance only; users are responsible for safe tool operation, verifying measurements, and maintaining a safe workshop environment.
Common mistakes to avoid
Incorrect print scale
Why it happens: Fit-to-page printing changes every template dimension.
How to avoid: Print the original template sheet at 100% / Actual Size and verify the labeled 7-inch edge with a ruler before gluing.
Hole tear-out on the back face
Why it happens: Plywood fibers can break out when the bit exits unsupported.
How to avoid: Clamp the plywood over a sacrificial backing board and drill at the template center marks. The hypotenuse hole is inset from the cut edge, not on it.
Cutting into the finished jig
Why it happens: The two triangles have separate diagonal outlines with waste between them.
How to avoid: Follow both outlines with the blade on the waste side. Check the perpendicular working edges with a square and preserve their straightness during sanding.
Finishing suggestions
- Leave the jigs unfinished for maximum layout visibility and easy remarking.