Self-Centering Marking Jig
A simple jig for marking the centreline of a straight, parallel-sided board. Made from a small ash body and two brass rods, with a centre hole sized to your pencil.
Woodworking · Beginner · 30 minutes
Tools
- Saw
- Drill or drill press
- 5/16-inch drill bit and a bit sized to your pencil
- Ruler
- Square
- File
Materials
- Ash
Hardware
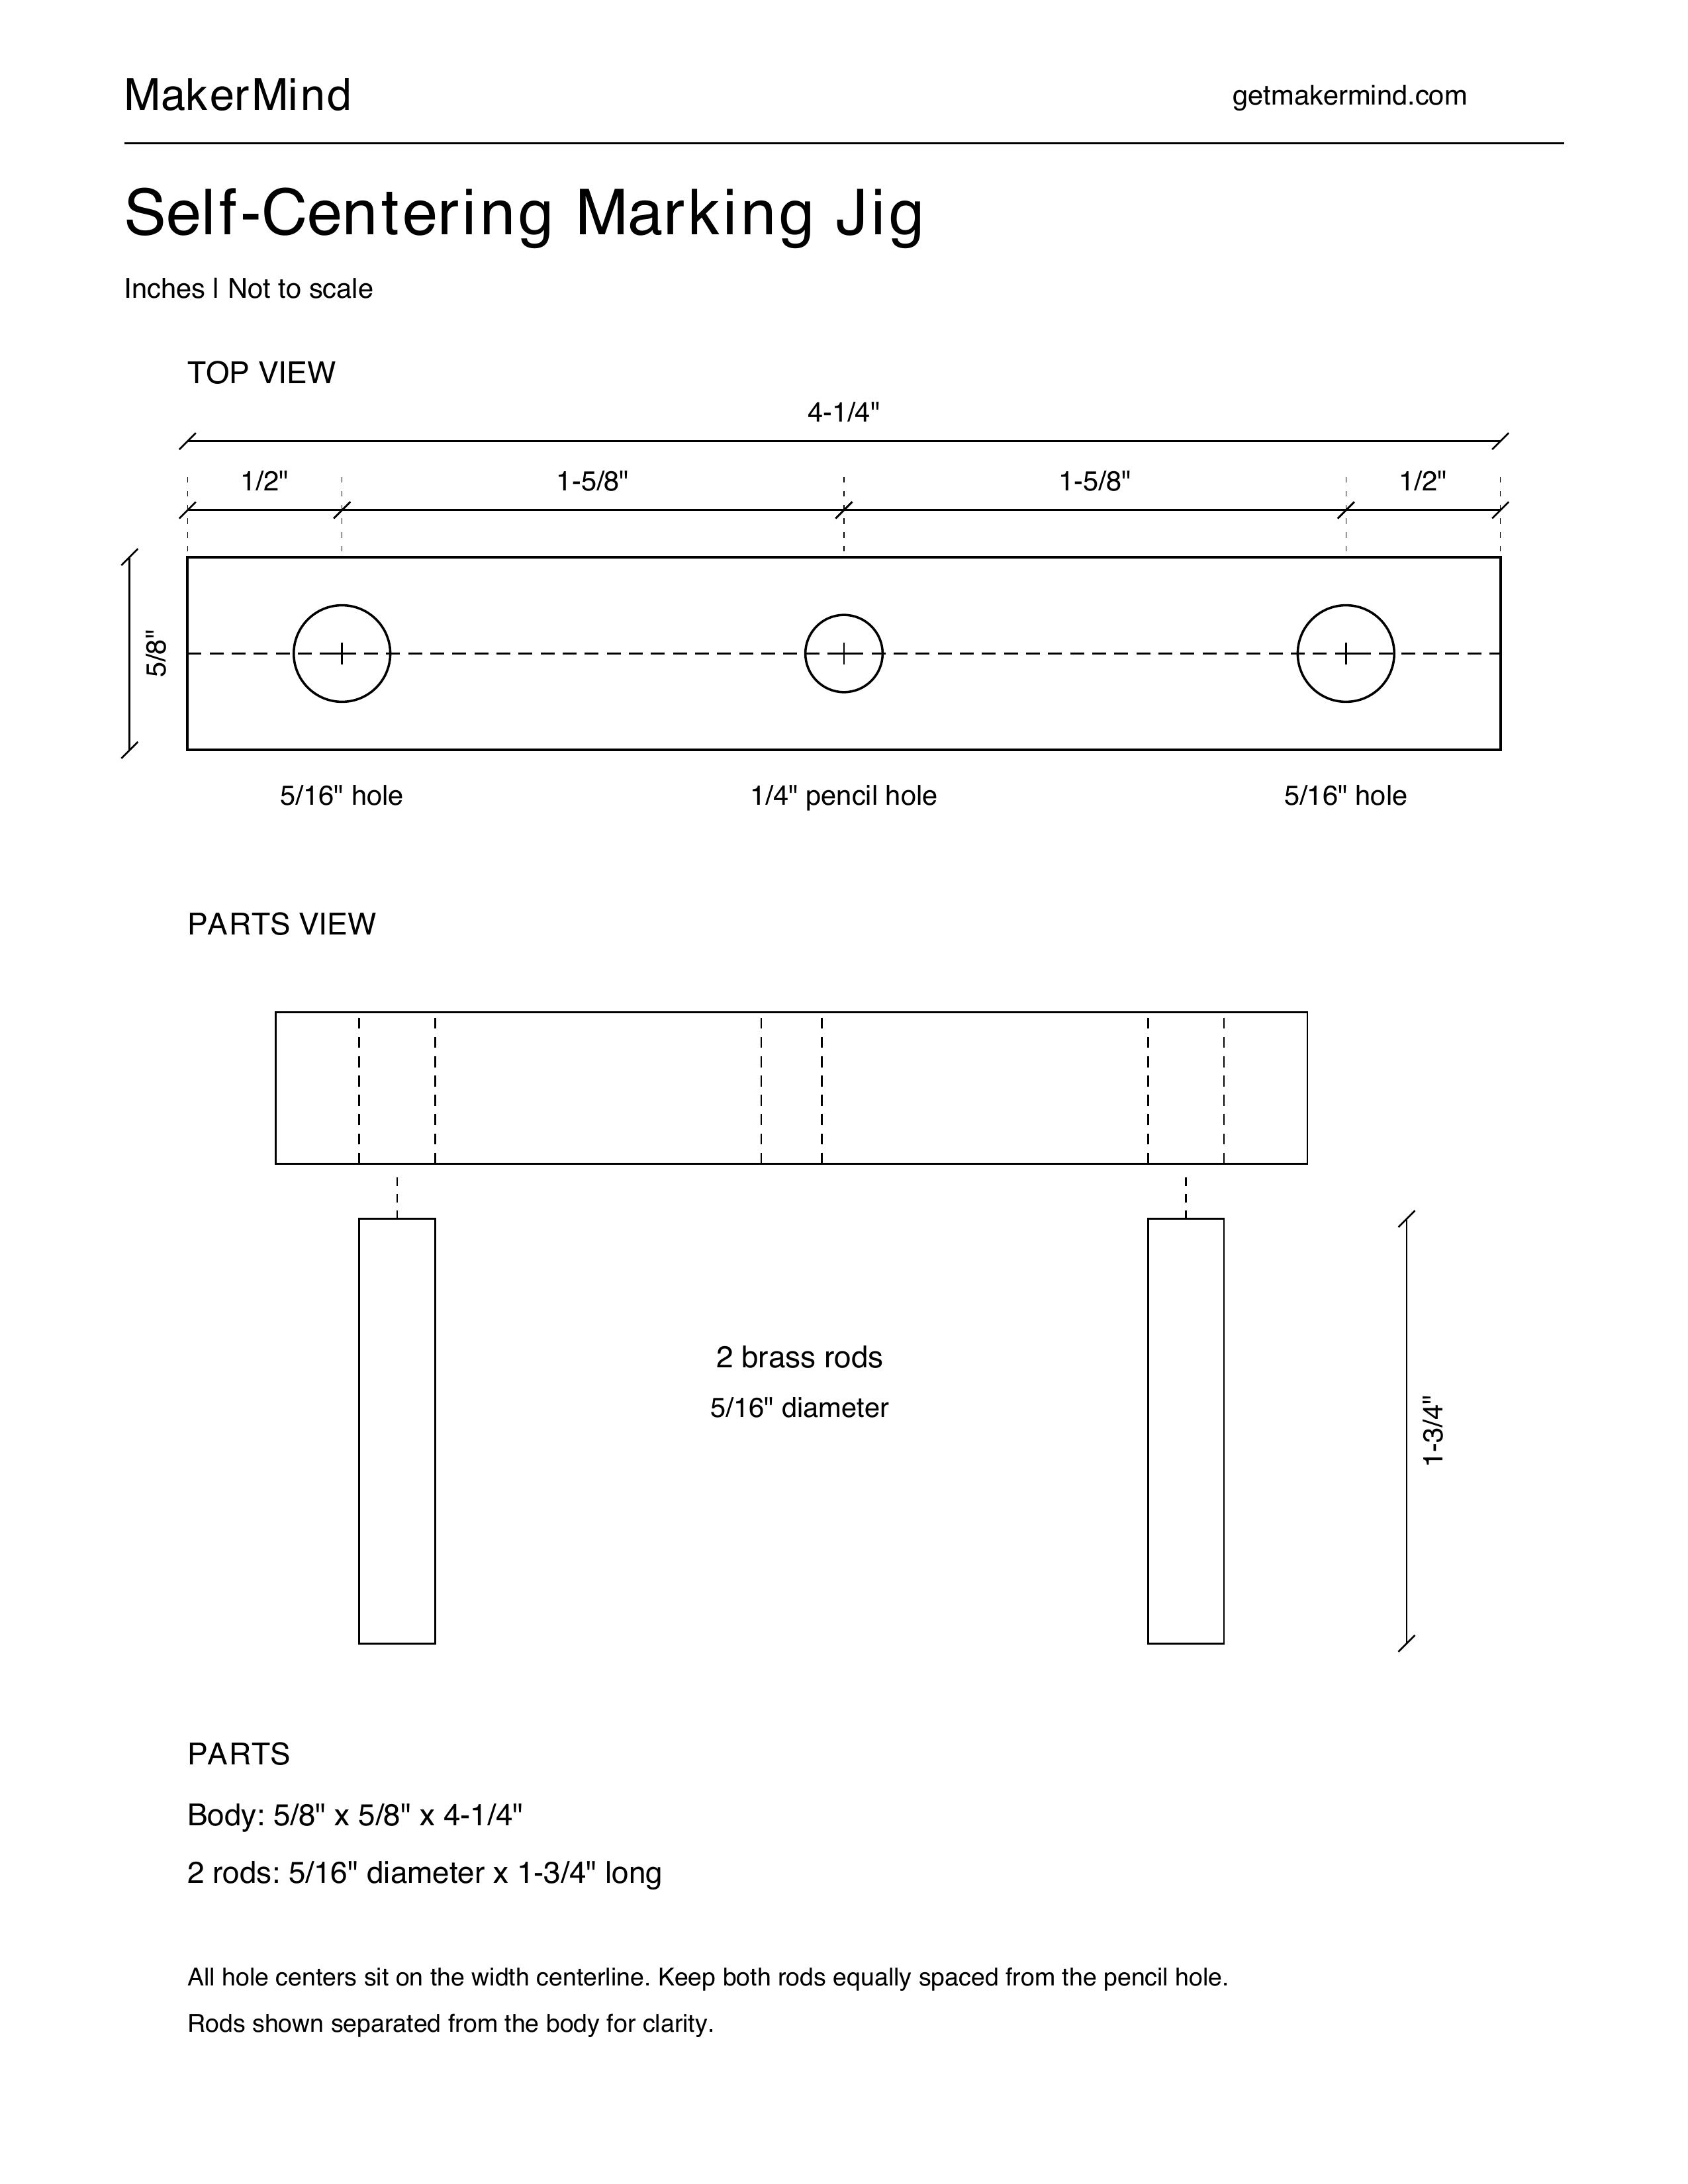
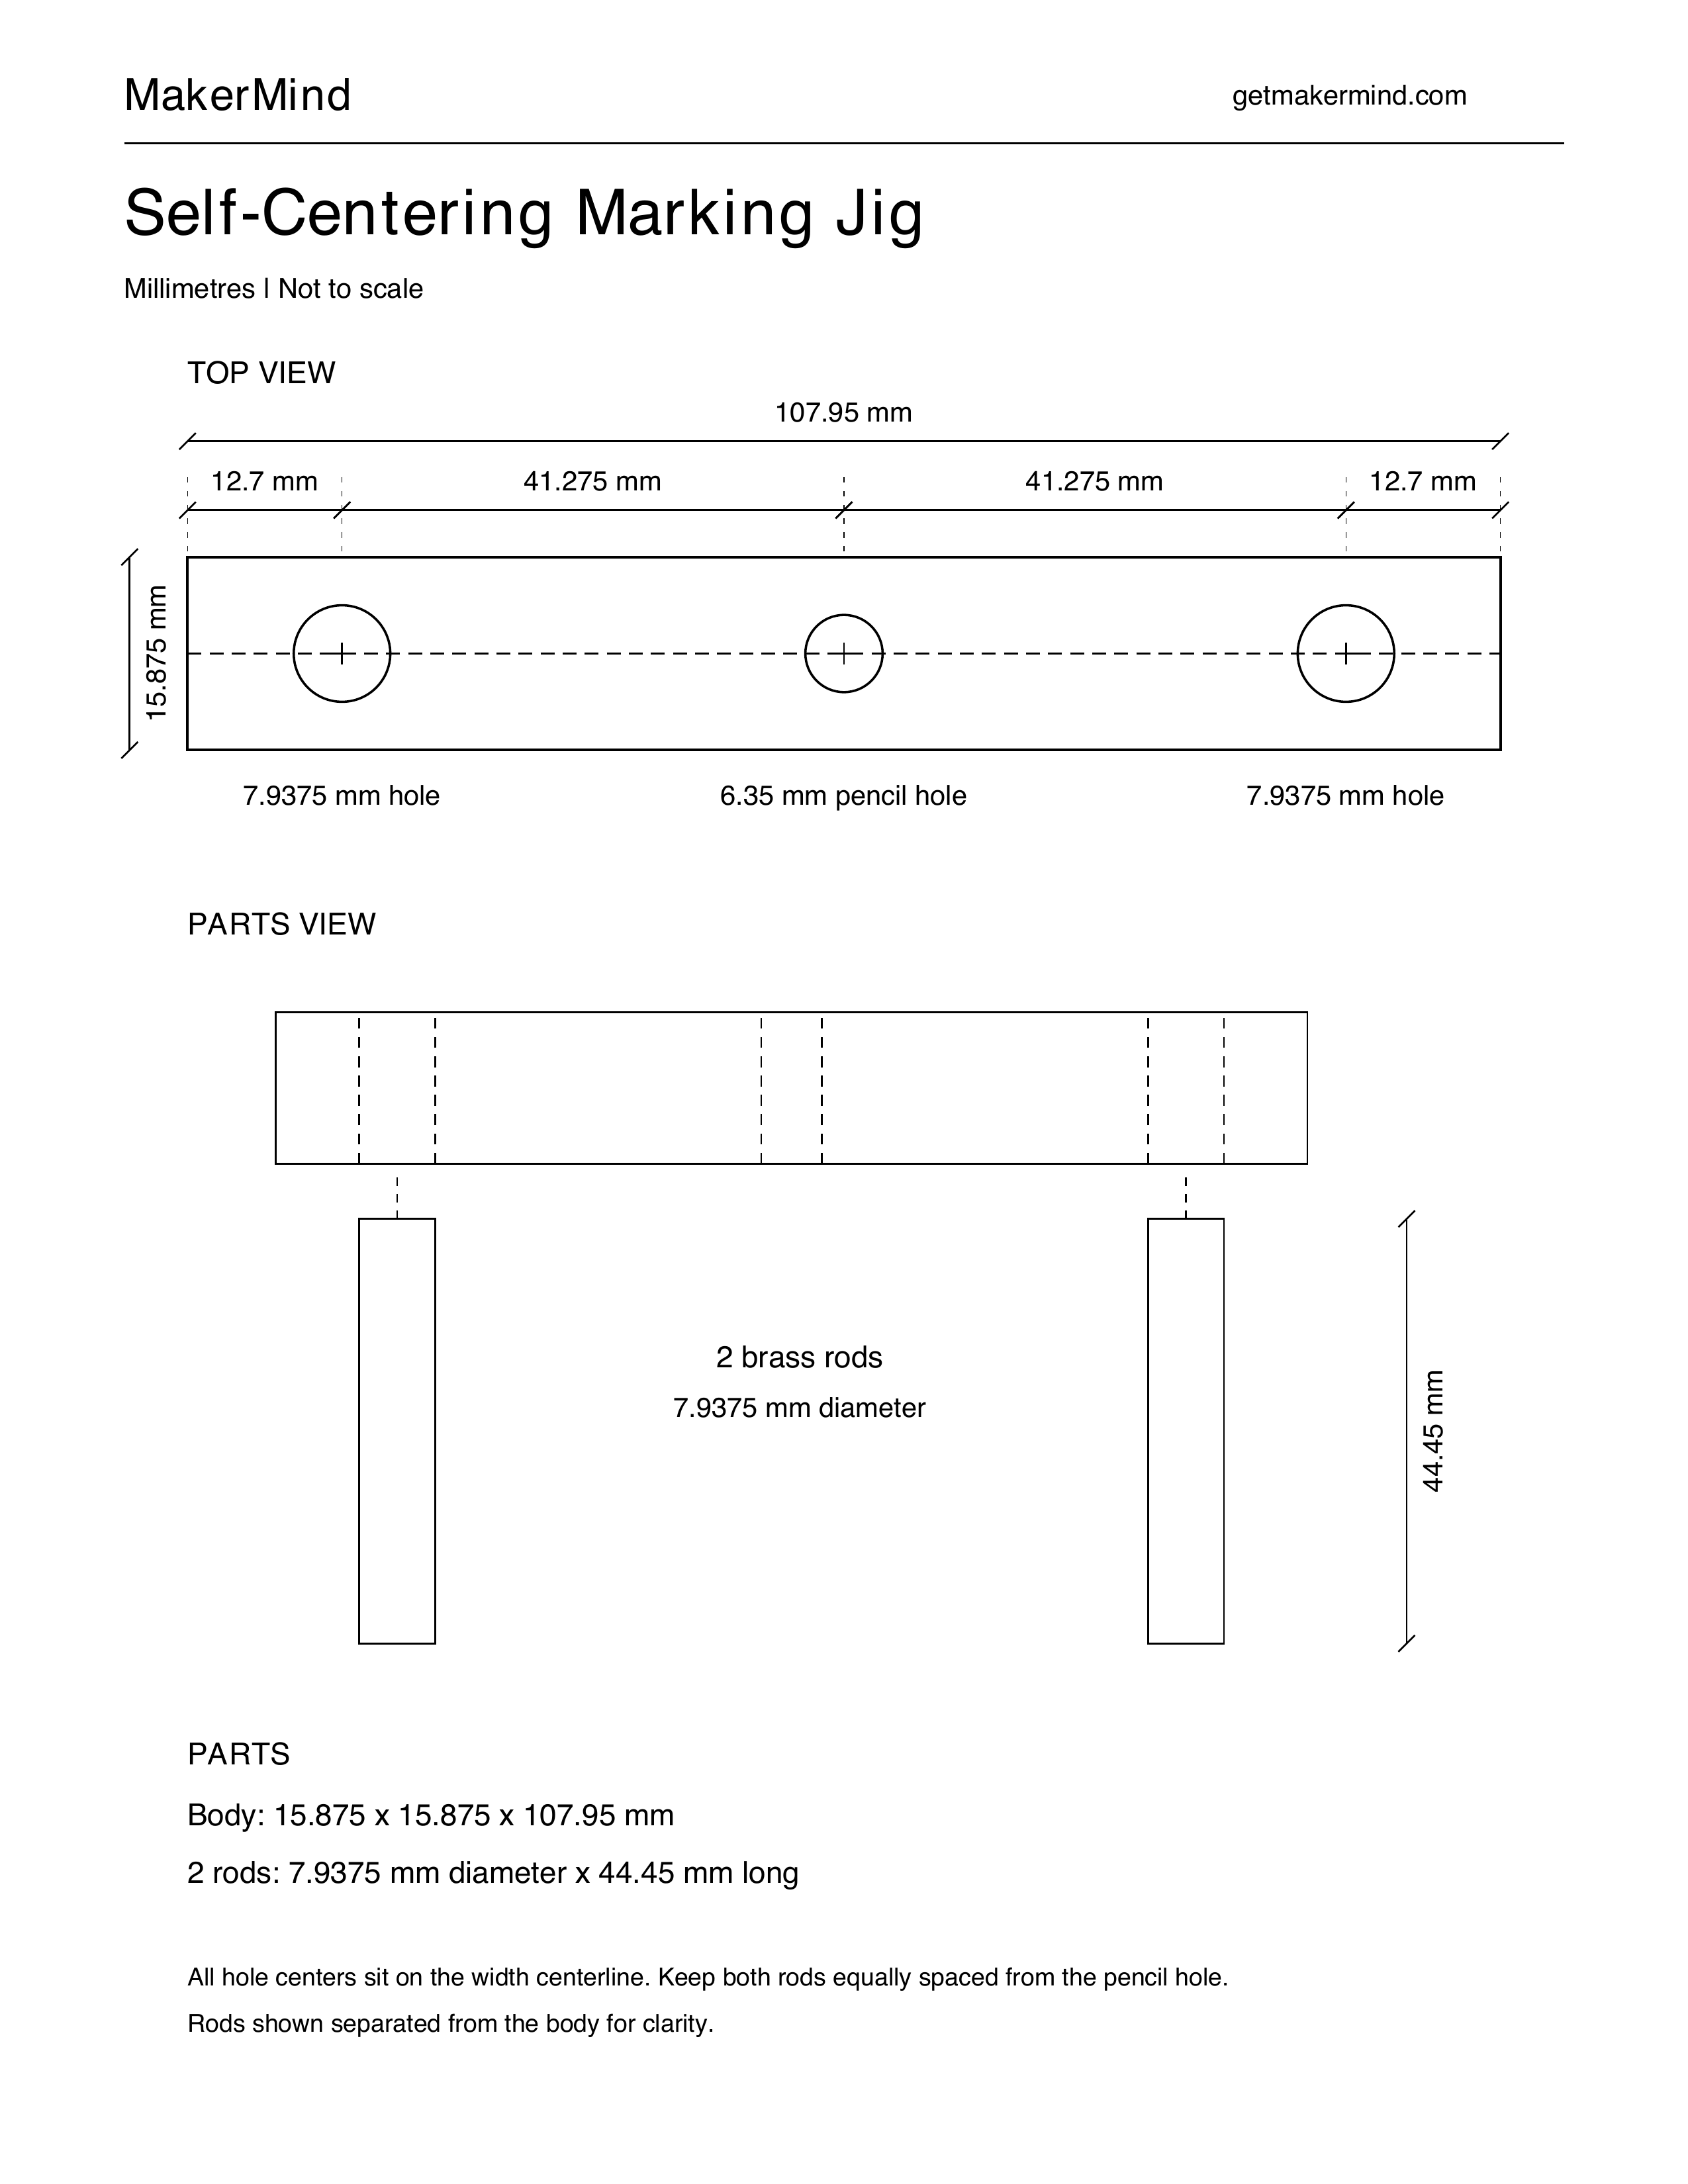
- 2 brass rods: 5/16-inch diameter x 1-3/4-inch long
Cut list
- Ash body — 1 × 5/8 in x 5/8 in x 4-1/4 in Ash
- Brass rods — 2 × 5/16 in diameter x 1-3/4 in long Brass
Diagrams
Build steps
Cut the body
• Cut the ash to ⅝″ × ⅝″ × 4¼″. Keep the faces straight and square.
Mark the holes
• Mark the two rod-hole centres ½″ inward from each end. Mark the pencil-hole centre at 2⅛″ from either end. Centre all three holes across the width.
Drill the holes
• Clamp the body over a scrap backing board. Drill both 5/16″ rod holes perpendicular to the body. Measure your pencil before drilling the centre hole and choose a bit that gives it a snug sliding fit. The diagram shows a nominal ¼″ pencil hole.
Fit the rods
• Cut both brass rods to 1¾″ and deburr the ends. Press or gently tap them into the outer holes. Keep them parallel, secure and protruding equally on the working side.
Test the jig
• Insert the pencil. Place the rods against opposite edges of a straight, parallel-sided board and rotate the jig until both rods touch. Keep both rods in contact as you slide it along to mark the centreline.
Safety notes
- Clamp the body when drilling, wear eye protection and remove sharp edges from the brass.
- Read the entire project plan and confirm all measurements, material sizes, and tool setups before beginning any cuts or assembly.
- Always follow manufacturer safety instructions and use proper safety equipment such as push sticks, guards, clamps, and stable work supports.
- Never operate tools while fatigued, distracted, or under the influence, and seek supervision or assistance when using unfamiliar tools or techniques.
- MakerMind provides informational project guidance only; users are responsible for safe tool operation, verifying measurements, and maintaining a safe workshop environment.
Common mistakes to avoid
Unequal hole spacing
Why it happens: The rod holes are not equally spaced from the pencil hole.
How to avoid: Mark each rod-hole centre 1/2 inch from its nearest end and the pencil-hole centre 2-1/8 inches from either end. Check that both rod centres are 1-5/8 inches from the pencil-hole centre.
Pencil hole too loose or too tight
Why it happens: The hole is drilled without checking the actual pencil size.
How to avoid: Measure your pencil before drilling. Test the bit size on scrap and aim for a snug sliding fit without side-to-side play.
Rods crooked or uneven
Why it happens: The holes are drilled at an angle or the rods are installed with unequal projection.
How to avoid: Drill perpendicular to the body. Keep both rods parallel, secure and protruding equally on the working side. Deburr their ends.
Only one rod touching the board
Why it happens: The jig is not rotated into contact with both edges, or contact is lost while marking.
How to avoid: Use a straight, parallel-sided board. Rotate the jig until the rods touch opposite edges, then maintain contact with both rods while sliding.
Finishing suggestions
- Leave unfinished. Remove sharp edges without changing the hole layout or rod fit.