Modern Edge-Grain Maple and Walnut Cutting Board
A beginner-friendly edge-grain cutting board made from S4S hard maple with three walnut accent strips. This clean kitchen project uses simple cutting, glue-up, sanding, rubber feet, and a food-safe mineral oil and beeswax finish.
Kitchen · Beginner · 4–6 hours plus overnight glue cure
Tools
- Tape Measure
- Pencil
- Circular Saw
- Miter Saw
- Clamps
- Random Orbital Sander
- Router (Optional)
- Drill
- Hand Plane or Sanding Block
Cut list
- Walnut accent strip — 3 × 19 in x 1 in x 3/4 in Walnut
- Maple field strip — 2 × 19 in x 3-1/2 in x 3/4 in Hard maple
Diagrams
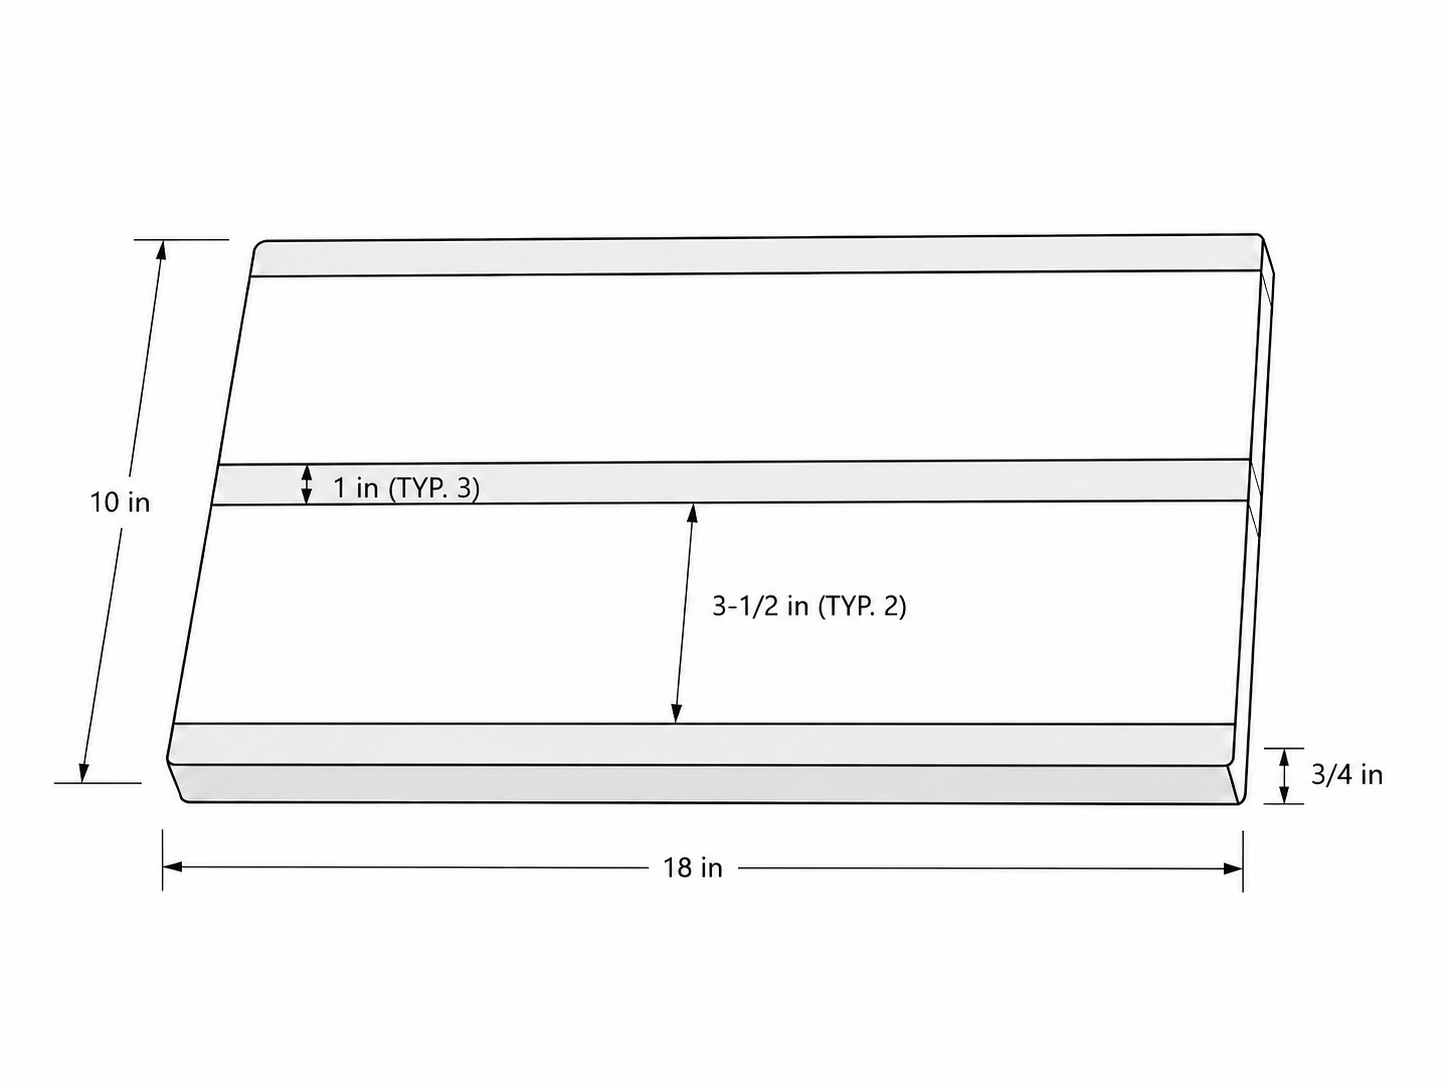
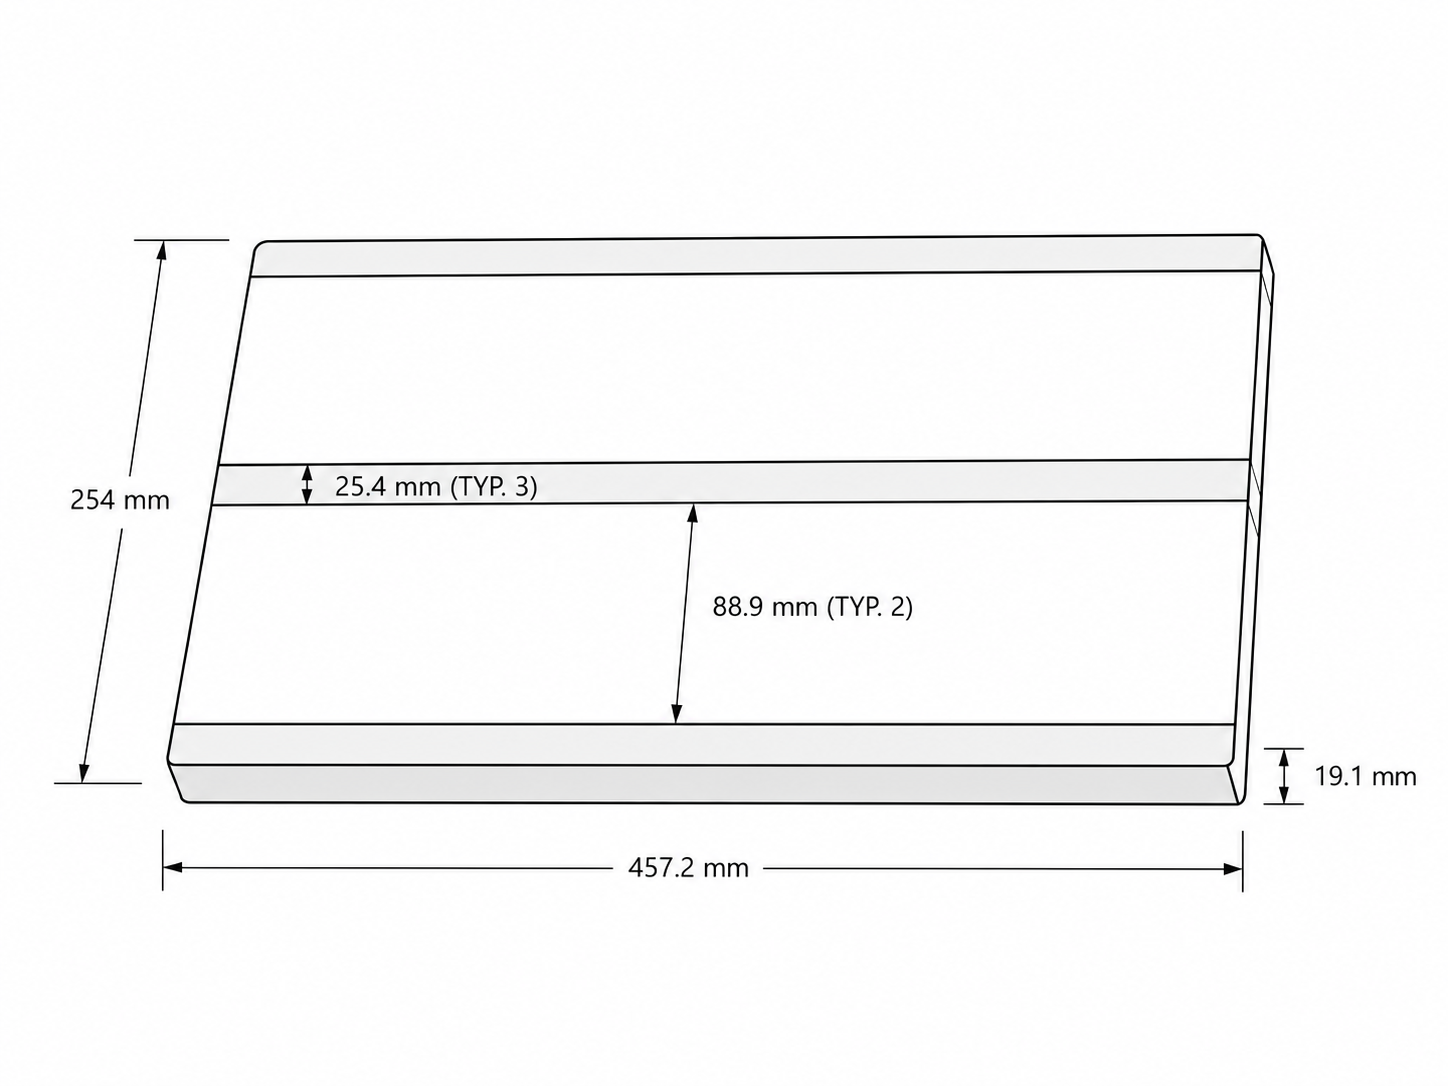
Build steps
Prep: Select Stock and Confirm Final Layout
• Choose the straightest maple and walnut pieces with minimal twist or cup. • Confirm all pieces can finish at 3/4 in thick and 19 in long before cutting. • Lay out the strips in this exact order: walnut, maple, walnut, maple, walnut. • Alternate the growth-ring direction of adjacent pieces to help the panel stay flat over time.
Cutting: Break Down Maple and Walnut Parts
• Cut all strips to 19 in long using the miter saw or circular saw. • Rip the walnut strips to 1 in wide using a circular saw with a straight guide, or use a table saw if available. • Make sure the rip guide is locked firmly before each cut so widths stay consistent. • Mark a large triangle across the top face so the strip order does not get mixed up. • Clamp the stock securely and keep the circular saw cord clear of the cut path.
Prep: Inspect Edges and Dry Fit the Glue-Up
• Press adjacent strips together and inspect each mating edge for visible gaps. • If needed, make light passes with a hand plane or sanding block until the joints close tightly. • Swap strip positions end-for-end if needed to get the tightest edge matches without changing the walnut-maple sequence. • Make sure the top faces are all oriented correctly before moving on. • Prepare clamps, cauls, and a damp rag so the glue-up can move quickly.
Assembly: Glue and Clamp the Panel
• Spread an even film of food-safe wood glue on each mating edge. • Assemble the strips in order and align the top faces as flush as possible by hand first. • Clamp across the width with bar or pipe clamps, alternating clamp positions above and below the panel to reduce bowing. • Add light clamping cauls across the top if needed to keep the faces aligned. • Make sure squeeze-out appears along every joint, then stop tightening once the joints are closed. • Use a damp rag or paper towel to remove glue squeeze-out; this is easier now than after it dries. • Leave the panel clamped flat on the bench for the full glue cure time.
Refinement: Flatten the Panel and Square the Blank
• Remove the clamps after the glue has cured fully. • Scrape or sand off dried glue before trimming. • Check the glue-up for uneven joints or slight ridges between strips. • Use a hand plane, drum sander, or careful random orbital sanding to level both faces. • Trim one end square first with a circular saw and straight guide or miter saw. • Measure and cut the second end so the board finishes at 18 in long.
Refinement: Sanding 1 - Up to 120 Grit
• Sand the top face first with the random orbital sander. • Begin with 80 grit only if needed to remove glue lines or uneven joints; otherwise start at 120 grit. • Sand both faces and edges evenly. • Keep the sander moving at all times because staying in one spot too long can create a dip in the surface. • Check the board under raking light before moving on.
Shaping: Ease the Edges
• Use a router with a 1/8 in or 1/4 in roundover bit, or make a very small chamfer for a clean modern look. • Rout the top perimeter first, then the bottom perimeter, moving steadily to avoid burn marks in the walnut. • Rout end grain first so any small tear-out can be cleaned up by the following edge-grain pass. • Keep the board flat on the bench while routing so the cut stays consistent around the full edge. • Sand the routed edges smooth and blend the profile into the faces with 120 grit sandpaper. • Keep both hands on the router and do not start the cut with the bit touching the wood.
Refinement: Raise the Grain Before Final Sanding
• Lightly spray the entire cutting board with water to raise the wood grain. • Allow the board to dry completely before continuing. • Once dry, lightly sand the surface with 180 grit, then continue up to 220 or 320 grit to remove the raised fibers without changing the board shape. • Raising the grain before finishing helps keep the cutting board smooth after it comes into contact with water during everyday use. • Remove all sanding dust before applying the food-safe finish.
Layout: Mark and Install the Rubber Feet
• Flip the board bottom-side up and mark four rubber foot locations evenly in from the corners. • Mark each rubber foot 1-1/4 in from both adjacent edges. • Drill pilot holes sized for the screws supplied with the rubber feet. • Check that the screw paths land safely inside solid wood. • Remove any pencil or layout lines during the final sanding pass. • Wait to install the rubber feet until after the finish has fully cured.
Finishing: Oil, Cure, Wax, and Install Feet
• Flood all faces and edges with mineral oil and let the board absorb as much as it will on the first coat. • Wipe off excess after the soak so the surface does not stay gummy. • Once the oil has settled, buff on a thin beeswax/mineral oil conditioner for extra moisture resistance and sheen. • Let the board rest flat until the finish has cured. • Install the rubber feet after the finish has fully cured. • Do a final wipe so the board is ready for kitchen use and display.
Safety notes
- Wear safety glasses, hearing protection, and appropriate respiratory protection when cutting, sanding, routing, or machining materials.
- Read the entire project plan and confirm all measurements, material sizes, and tool setups before beginning any cuts or assembly.
- Always follow manufacturer safety instructions and use proper safety equipment such as push sticks, guards, clamps, and stable work supports.
- Never operate tools while fatigued, distracted, or under the influence, and seek supervision or assistance when using unfamiliar tools or techniques.
- Maker Mind provides informational project guidance only; users are responsible for safe tool operation, verifying measurements, and maintaining a safe workshop environment.
Finishing suggestions
- Use straight mineral oil for a natural, easy-to-renew finish.
- Top the cured oil with a beeswax conditioner for a slightly richer look and added water resistance.
- Reapply mineral oil whenever the board looks dry or chalky, especially after washing.
- Avoid film-forming finishes because cutting boards need a food-safe, renewable surface.