Simple Cedar Birdhouse with Angled Roof
A beginner-friendly cedar birdhouse with a simple angled roof, basic joinery, and weather-resistant construction. Designed to be affordable, approachable, and buildable in about two hours using common shop tools.
Outdoor Projects · Beginner · 2 hours
Tools
- Tape Measure
- Speed Square
- Pencil
- Drill
- Circular Saw
- Brad Nailer
- Random Orbital Sander
Cut list
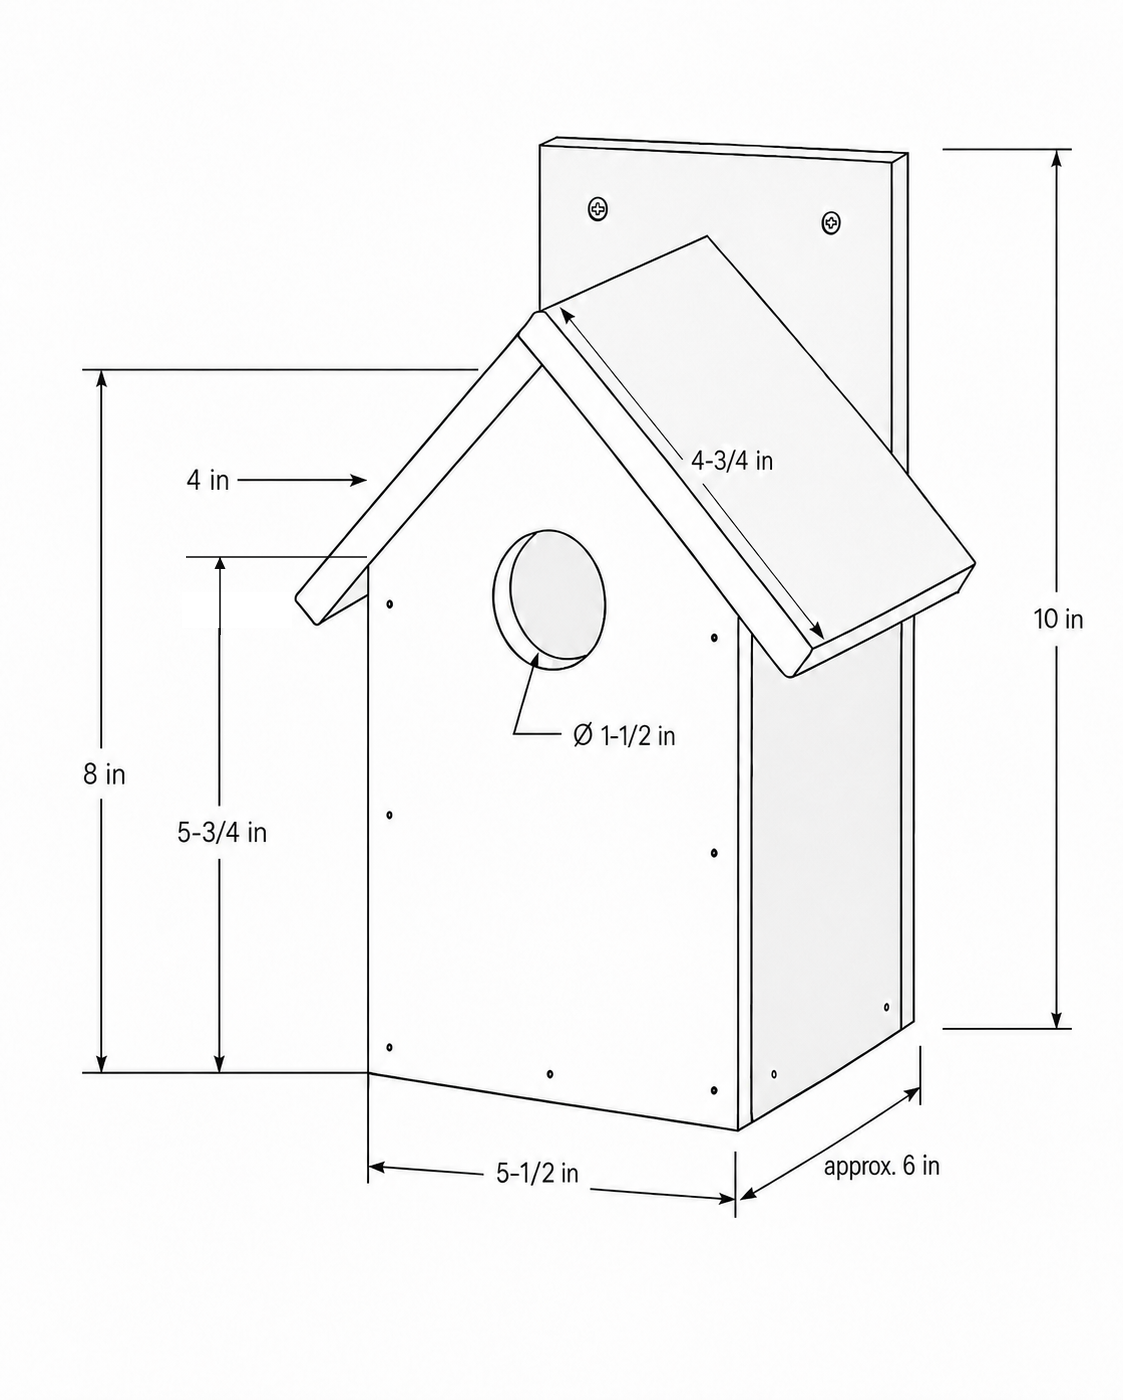
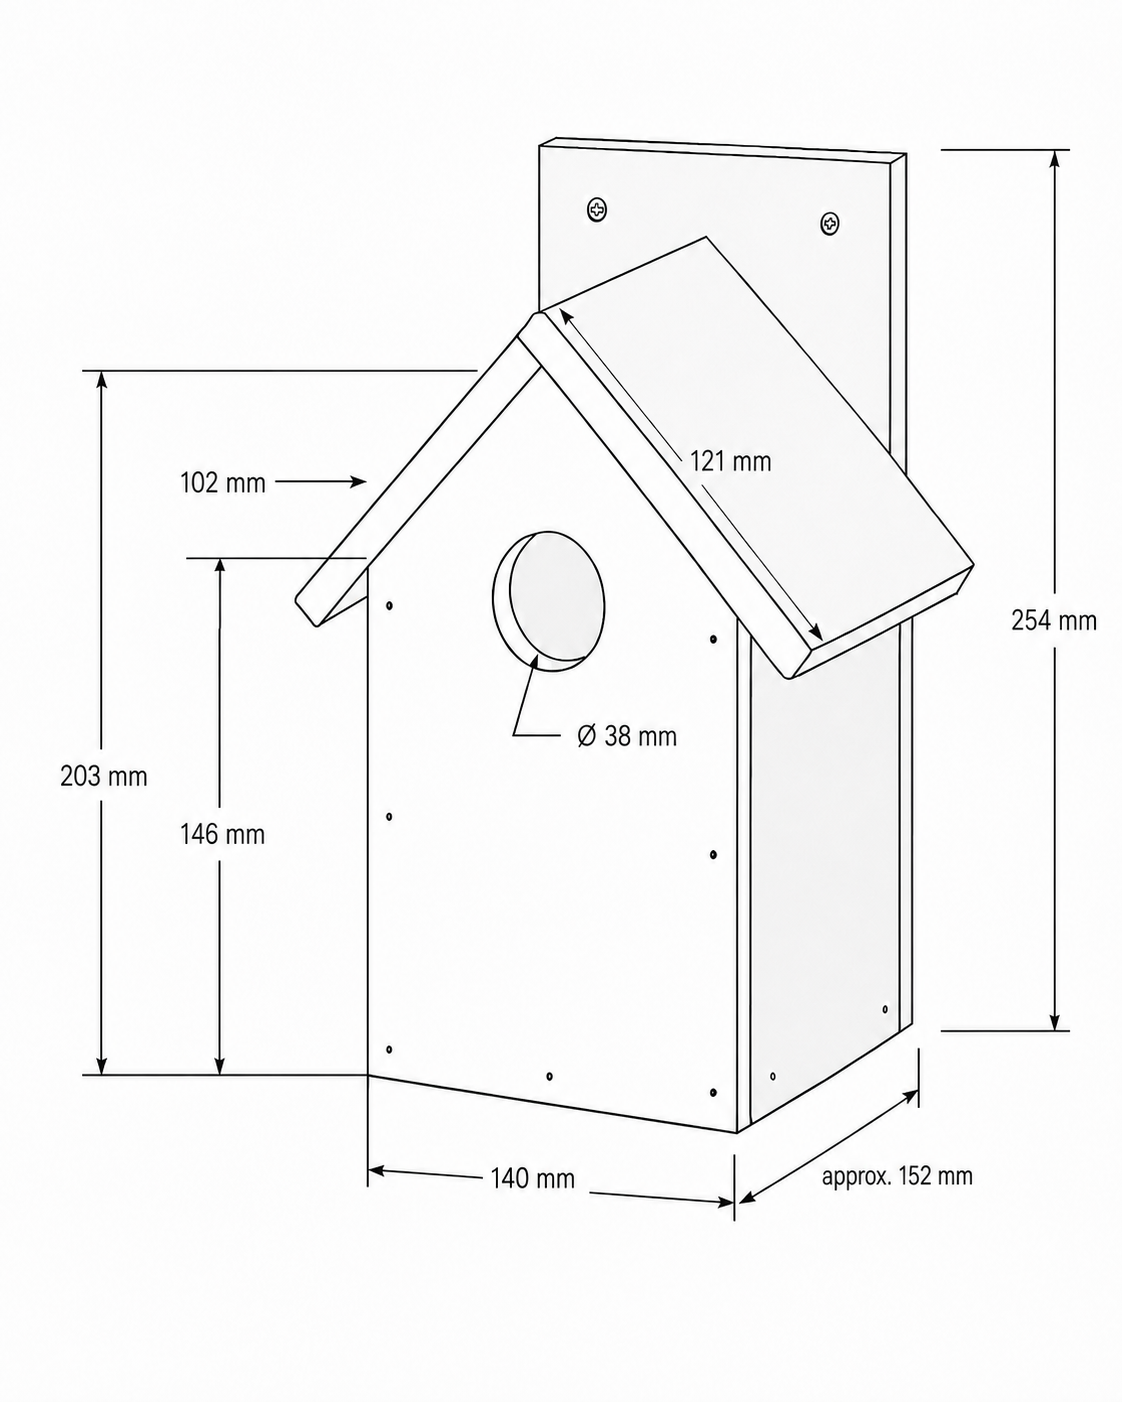
- Front panel — 1 × 5 1/2 in W x 8 in H Cedar 1x6
- Back panel — 1 × 5 1/2 in W x 8 in H Cedar 1x6
- Left side piece — 1 × 5 1/2 in W x 5 3/4 in H Cedar 1x6
- Right side piece — 1 × 5 1/2 in W x 5 3/4 in H Cedar 1x6
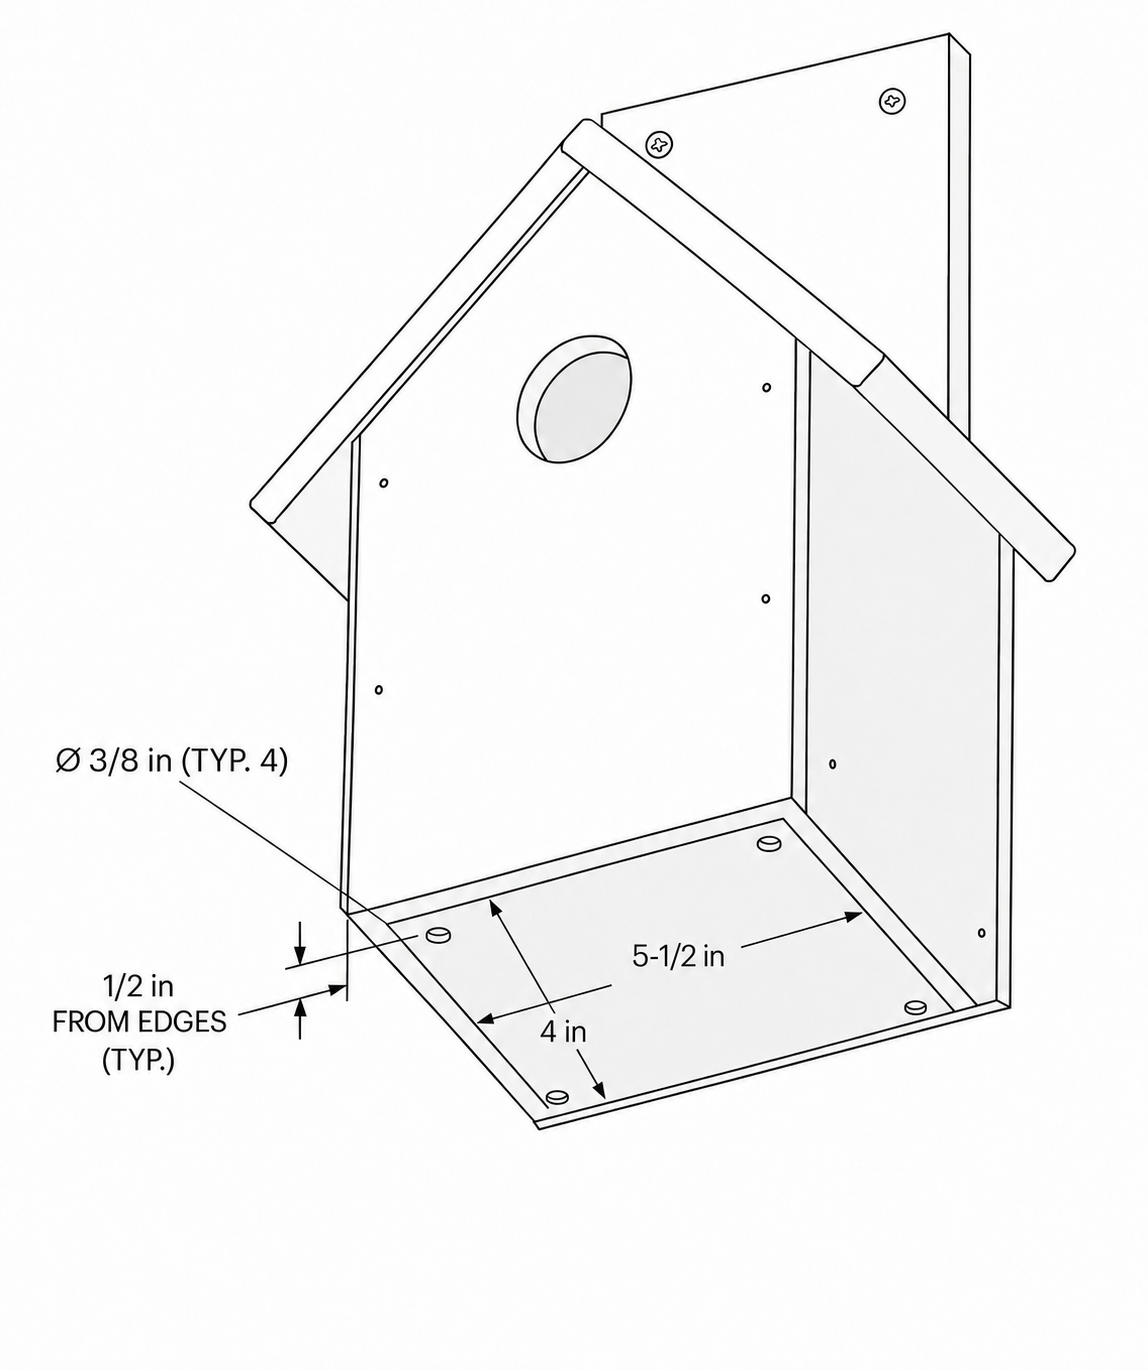
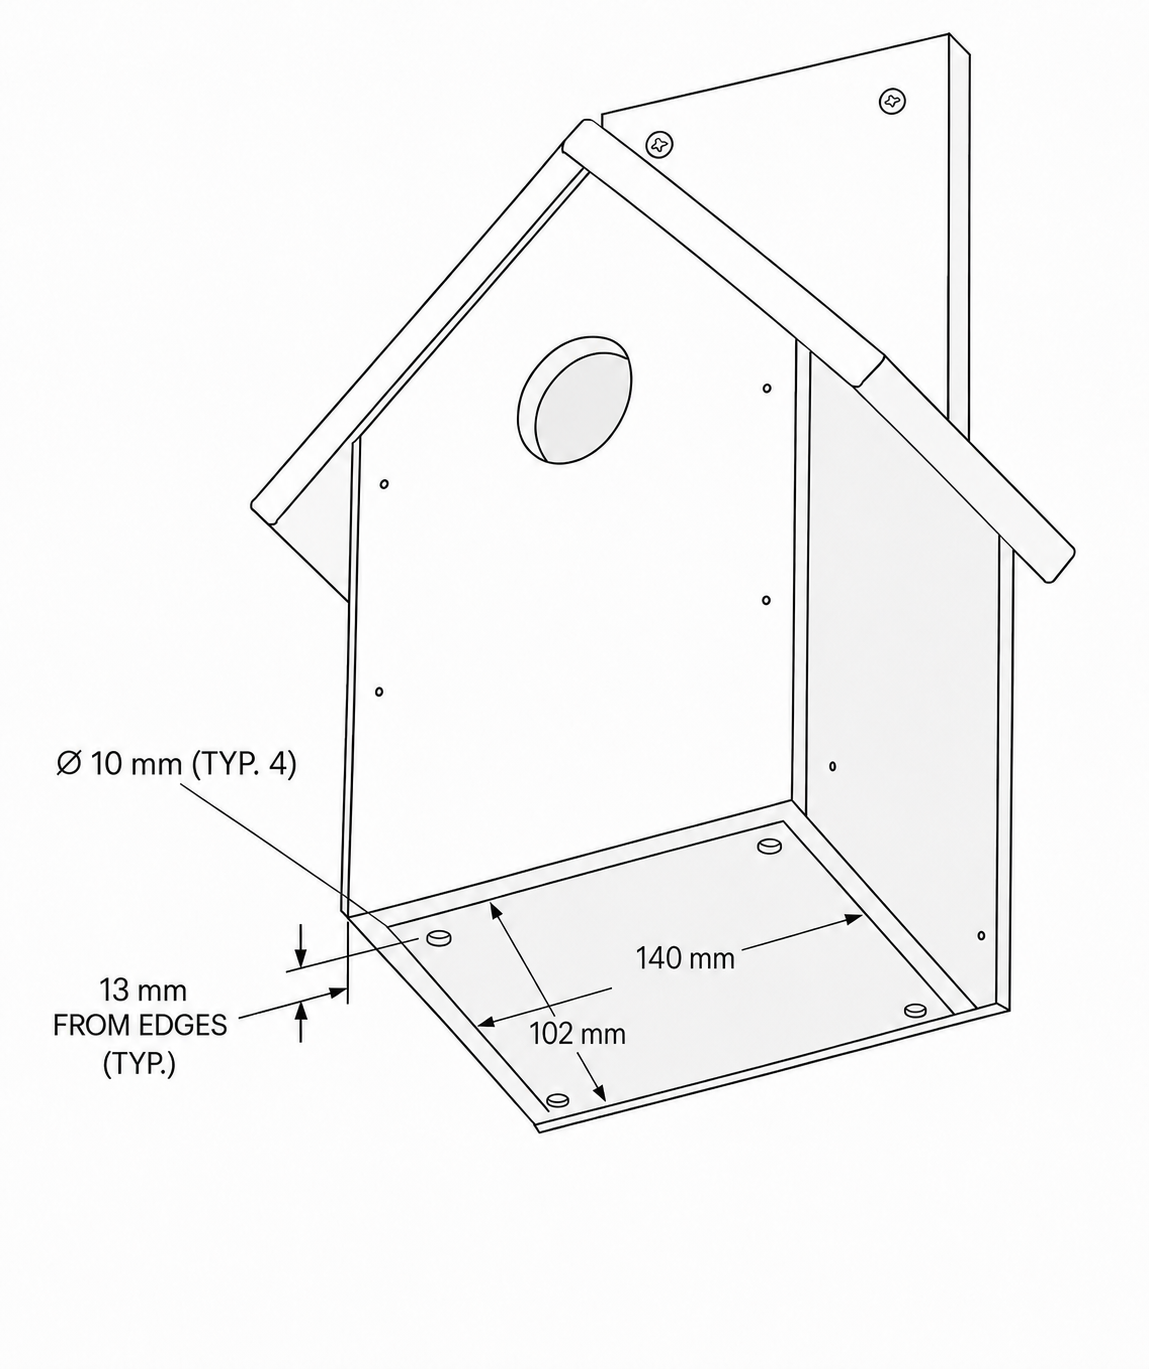
- Bottom panel — 1 × 5 1/2 in W x 4 in H Cedar 1x6
- Roof piece 1 — 1 × 5 1/2 in W x 4 in H Cedar 1x6
- Roof piece 2 — 1 × 5 1/2 in W x 4 3/4 in H Cedar 1x6
- Back mounting piece — 1 × 5 1/2 in W x 10 in H Cedar 1x6
Diagrams
Build steps
Layout & Marking
• Use your tape measure and pencil to carefully mark out all pieces on the cedar board. • Since you're new to this, take your time to make clear, accurate marks. • Remember to factor in the saw blade kerf (the width of the saw cut) as this affects final sizes. • Label every piece clearly with the pencil to avoid confusion later. • Use your speed square to get perfect right angles on all cut lines. • When marking roof pieces, be precise and mark both as a matching pair. • Measure 2 1/4 in from either end of both roof pieces exactly. • Mark a 45-degree angle from the center outward on both sides using the speed square. • Double-check your measurements; the roof pieces should form a neat point at the top. • Confirm that both roof pieces match exactly before cutting.
Cutting the Pieces
• Since you're a beginner, working on a stable workbench will help keep wood steady while cutting. • Use your circular saw or miter saw for straight cuts; the hand saw or jigsaw can help with intricate shapes. • Take your time to keep cuts accurate and steady, especially around the roof angles. • Follow the lines closely but don't cut into the markings; you'll clean edges later with sanding. • Keep each piece organized as you cut to avoid mix-ups. • Consider clamping the wood to your workbench for safer, cleaner cuts.
Drill Entry & Drainage Holes
• Find the center of your front panel left-to-right using your tape measure and mark it clearly. • Measure down 2 1/4 in from the top where the roof peak would be. • As a beginner, using a drill with a 1 1/2 in hole saw bit is ideal for the entry hole. If you don’t have one, start with a smaller drill bit to make a pilot hole. • Then carefully use your jigsaw to enlarge the hole to the correct size, working slowly for a clean edge. • Use a 3/8 in drill bit to make the four drainage holes in the bottom panel, placing each hole 1/2 in from the corners. • Secure the board firmly with clamps to keep it steady while drilling.
Sanding
• Using your random orbital sander with 120 grit sandpaper will speed this process and give a smooth finish. • If you prefer, sanding by hand gives you more control especially on edges and inside corners. • Smooth all surfaces until they’re pleasant to touch. • Lightly round any sharp edges with the sander or sandpaper to prevent splinters.
Assemble the Main Box
• Before gluing, do a dry fit of all pieces to check alignment and fit. • Apply exterior wood glue evenly on all mating edges. • Position the side panels between the front and back panels, checking that the grain runs vertically. • Use clamps to hold the panels tightly together; this will improve the final fit. • Nail the pieces with 4 brad nails per edge, keeping everything flush and square. • Check corners with the speed square during assembly to prevent the box from becoming out of square.
Install the Bottom Panel
• Spread wood glue on the edges of the bottom panel. • Clamp the panel in place flush with the bottom edges of the birdhouse. • Secure it using brad nails. • Double-check the panel is even and fits snugly before the glue sets.
Install Roof & Mounting Back
• Glue and nail the first roof piece in place, aligning the top edge perfectly with the roof peak. • Before nailing the second roof piece, dry fit it to make sure the overhang matches on both sides. • The second roof piece should overlap the first by about 1/4 in to create a balanced roof. • Use clamps to hold both roof panels together if needed before nailing. • Glue and nail the back mounting panel securely onto the rear side of the birdhouse, ensuring it's flush and stable for mounting.
Final Sanding
• Let the glue dry fully as per the instructions on your wood glue. • Once dry, use 120 grit sandpaper with your random orbital sander or by hand to smooth any glue squeeze-out or rough spots. • Check all edges and joints carefully and sand any uneven areas for a neat finish.
Mounting the Birdhouse
• Drill two pilot holes near the top of the back mounting plate to prevent splitting. • Use exterior-grade screws for durability when mounting the birdhouse to a post, fence, tree, or wall. • Secure the birdhouse firmly, using your clamps if needed to hold it steady while you fasten. • Pick a location that offers some protection from harsh weather and predators for the birds.
Safety notes
- Wear safety glasses and hearing protection when cutting, drilling, sanding, or fastening.
- Clamp parts securely before cutting or drilling whenever possible.
- Keep hands away from saw blades, drill bits, and nailer contact points.
- Use exterior-safe mounting hardware and make sure the birdhouse is securely fastened before use.
- Do not finish the inside of the birdhouse or the inside of the entry hole.
Finishing suggestions
- Leave the cedar unfinished for a natural weathered look and low maintenance.
- For longer color retention, apply an exterior oil or clear outdoor sealer to outside surfaces only.
- Do not finish the inside of the birdhouse or the inside of the entry hole.
- If painting, use muted exterior-grade colors on outside surfaces only.