Removable Birch Dog Crate Top with Wraparound Apron
A beginner-friendly removable birch top that converts a wire dog crate into a durable tabletop surface. A vertical wraparound apron captures the outside of the crate frame and helps prevent the top from sliding while allowing it to lift off when needed.
Pets · Beginner · 4–6 hours plus glue and finish drying time
Tools
- Tape Measure
- Pencil
- Combination Square
- Circular Saw
- Straightedge Saw Guide
- Brad Nailer
- Bar, Pipe, or F-Style Clamps
- Random Orbital Sander
- Block Plane
- Sanding Block
Cut list
- Center top panel — 1 × Example: 36-5/8 in L x 24-1/4 in W x 3/4 in thick Edge-glued birch project panel or 3/4 in birch plywood
- Long apron pieces — 2 × Example: 36-5/8 in L x 1-1/2 in H x 3/4 in thick Birch offcuts
- End apron pieces — 2 × Example: 25-3/4 in L x 1-1/2 in H x 3/4 in thick Birch offcuts
Diagrams
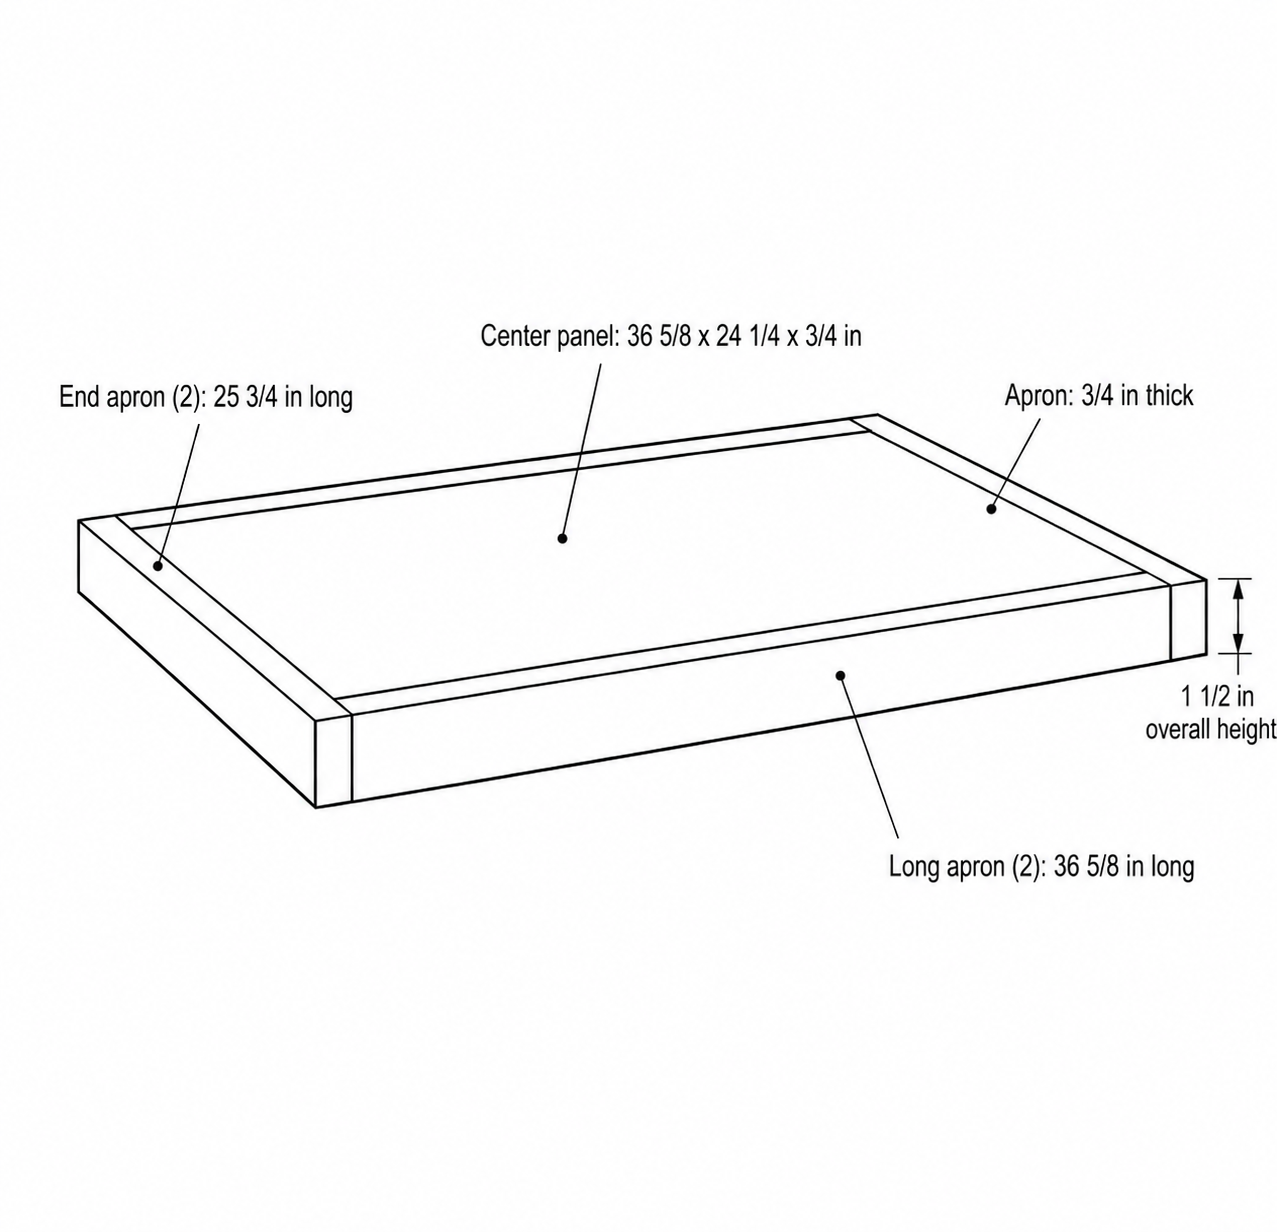
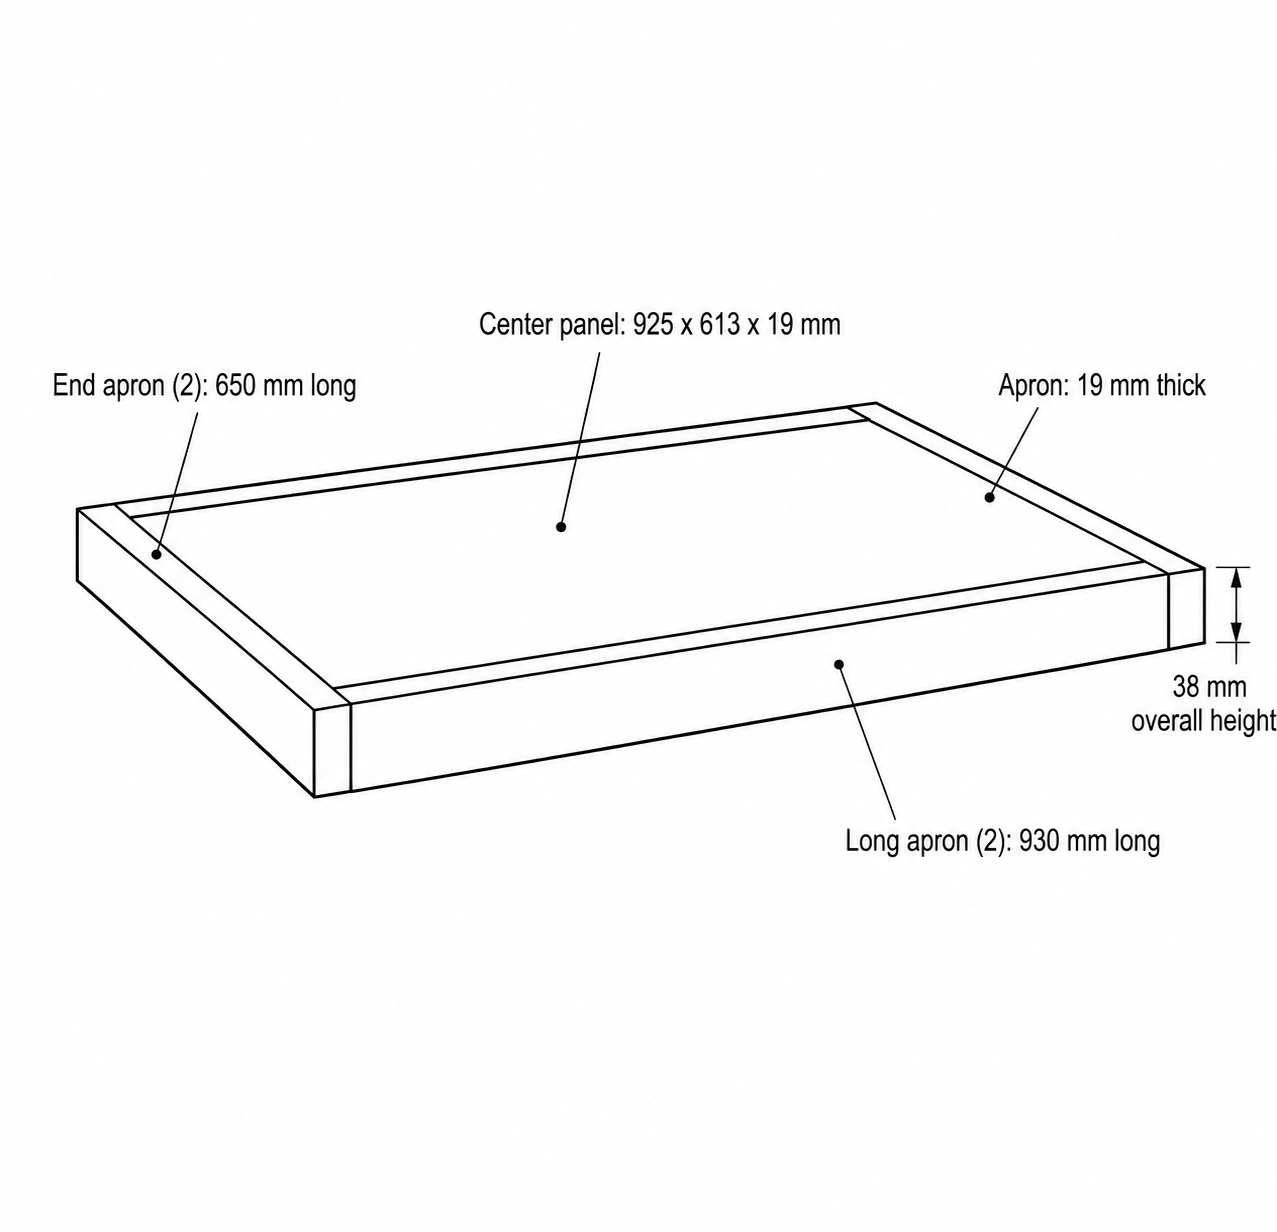
Build steps
Planning: Measure the Crate and Determine the Panel Size
• Measure the upper wire frame from outside edge to outside edge in both directions. • Take measurements at the front, back, left, and right because wire crates are not always perfectly square. • Use the largest length and width measurements. • Add approximately 1/8 in of total clearance in each direction so the apron can fit around the crate without binding. • Record these dimensions as the target center-panel size. • Confirm that the apron will not interfere with the crate door, latches, handles, or folding hardware. • Do not rely on the crate’s advertised nominal dimensions.
Assembly: Prepare and Glue the Birch Panels
• Inspect both birch project panels and choose the best faces for the top surface. • Place the panels side by side with their long mating edges together. • Check that the joint closes without visible gaps. • If necessary, lightly straighten the mating edges before gluing. • Apply a thin, even layer of wood glue along the complete joint. • Bring the panels together and align their ends. • Clamp across the glue joint with even pressure. • Use cauls or additional clamps if needed to keep the faces aligned. • Apply only enough pressure to close the joint without bowing the glue-up. • Remove heavy squeeze-out and allow the glue to cure fully.
Refinement: Flatten and Sand the Glue Joint
• Remove the clamps and inspect both faces of the glue-up. • Scrape away any remaining glue without damaging the birch. • If one side of the joint is slightly proud, carefully level the high area with a block plane. • Follow with the random orbital sander until the transition feels smooth. • Keep the sander moving so a hollow is not created along the seam. • Begin with 120 grit only where necessary. • Stop before final sanding because the panel still needs to be cut and fitted.
Cutting: Cut the Center Panel to Its Final Size
• Lay out the measured center-panel length and width. • Confirm both diagonals of the layout are equal before cutting. • Clamp a straightedge guide in position for the circular saw. • Support the panel and offcut throughout each cut. • Cut the panel to its final dimensions. • Use painter tape along the cut line if needed to reduce surface tear-out. • Check the panel on the crate and confirm that it covers the complete upper frame. • Remember that the apron will add another 3/4 in beyond every panel edge.
Cutting: Cut the Apron Pieces
• Rip the apron material from the remaining birch offcuts. • Cut all four strips to 1-1/2 in high. • Keep the strips at their full 3/4 in material thickness. • Cut the two long apron pieces to match the center-panel length. • Measure the actual apron thickness rather than assuming it is exactly 3/4 in. • Cut each end apron to the center-panel width plus twice the actual apron thickness. • For the example, cut the long aprons to 36-5/8 in and the end aprons to 25-3/4 in. • Label the inside face and top edge of each piece.
Fitting: Dry-Fit the Wraparound Apron
• Place the center panel on a flat workbench. • Position one long apron vertically against each long panel edge. • Align the top edge of each apron with the panel top face. • Position the two end aprons across the ends of the panel and long aprons. • Confirm that the end pieces cover the exposed ends of both long apron pieces. • Temporarily secure the apron with clamps or strong tape. • Place the assembly over the crate. • Confirm that the crate upper frame enters the apron opening without being forced. • Push the top gently in every direction and confirm that the apron limits unwanted movement. • Lift the top off and reinstall it several times. • Adjust the opening before applying glue or nails.
Assembly: Attach the Long Apron Pieces
• Return the center panel to a flat workbench. • Apply a thin, even layer of wood glue to one long panel edge. • Position the corresponding long apron with its top edge flush with the top face. • Clamp the apron securely and check its alignment from end to end. • Drive 1-1/4 in 18-gauge brads through the apron and into the center of the panel edge. • Keep the nailer square to the edge to reduce the chance of a brad exiting through either face. • Repeat the process for the second long apron. • Check that both aprons remain straight, parallel, and flush with the top.
Assembly: Attach the End Apron Pieces
• Dry-fit both end aprons again after the long pieces are attached. • Confirm that each end apron spans the panel and covers both long-apron ends. • If using birch plywood, glue and brad-nail the end aprons normally. • If using an edge-glued solid-birch panel, apply glue only near the center of each end edge rather than across the complete width. • This small unglued allowance reduces restraint across the solid panel’s seasonal movement. • Clamp each end apron with its top edge flush with the top face. • Drive brads through the end apron into the panel edge. • Add carefully positioned brads at the corner joints if needed. • Remove glue squeeze-out before it hardens. • Recheck the opening on the actual crate before the glue cures completely.
Refinement: Plane, Ease, and Sand the Edges
• Inspect the top edge where the panel and apron meet. • Use the block plane to remove any small proud areas. • Lightly ease the exposed upper edges and corners with the block plane. • Blend the eased edges by hand sanding. • Sand the top face, glue joint, apron faces, corners, and underside. • Progress through 120, 180, and 220 grit as required. • Keep the random orbital sander moving with light pressure. • Hand-sand the inside apron corners and other areas the orbital sander cannot reach. • Preserve the apron fit by avoiding excessive sanding on its inside faces.
Finishing: Apply the Hard-Wax Oil
• Remove all sanding dust with a vacuum, brush, or clean cloth. • Apply a thin, even coat of hard-wax oil to the top and apron. • Coat the underside so the piece is finished consistently. • Work the finish into the grain and remove all excess. • Do not allow finish to pool in the inside apron corners. • Allow the first coat to cure according to the finish manufacturer instructions. • Apply a second thin coat if recommended. • Let the finish cure fully before placing the top into service.
Final Fit: Confirm Stability and Clearance
• Place the cured top over the crate without forcing it. • Confirm that it seats naturally and rests flat. • Check for rocking at every corner. • Push lightly from several directions and confirm that the apron prevents the top from sliding off. • Remove and reinstall the top several times. • Confirm that the finished apron still clears the crate frame, latches, handles, and folding hardware. • If one location is tight, sand only that area of the apron’s inside face. • The top is suitable for ordinary tabletop use and substantial, evenly distributed household items. • Do not use the top as a seat, step, climbing surface, or support for a person.
Safety notes
- Wear safety glasses, hearing protection, and appropriate respiratory protection when cutting, sanding, routing, or machining materials.
- Read the entire project plan and confirm all measurements, material sizes, and tool setups before beginning any cuts or assembly.
- Always follow manufacturer safety instructions and use proper safety equipment such as push sticks, guards, clamps, and stable work supports.
- Never operate tools while fatigued, distracted, or under the influence, and seek supervision or assistance when using unfamiliar tools or techniques.
- Maker Mind provides informational project guidance only; users are responsible for safe tool operation, verifying measurements, and maintaining a safe workshop environment.
Finishing suggestions
- Use matte or satin hard-wax oil to preserve the birch’s natural appearance.
- Apply two thin coats instead of one heavy coat.
- Finish the top, edges, apron, and underside consistently.
- Wipe pooled finish from the inside corners so it does not affect the fit.
- Refresh the upper surface with a light maintenance coat after wear becomes visible.