Router Circle-Cutting Jig
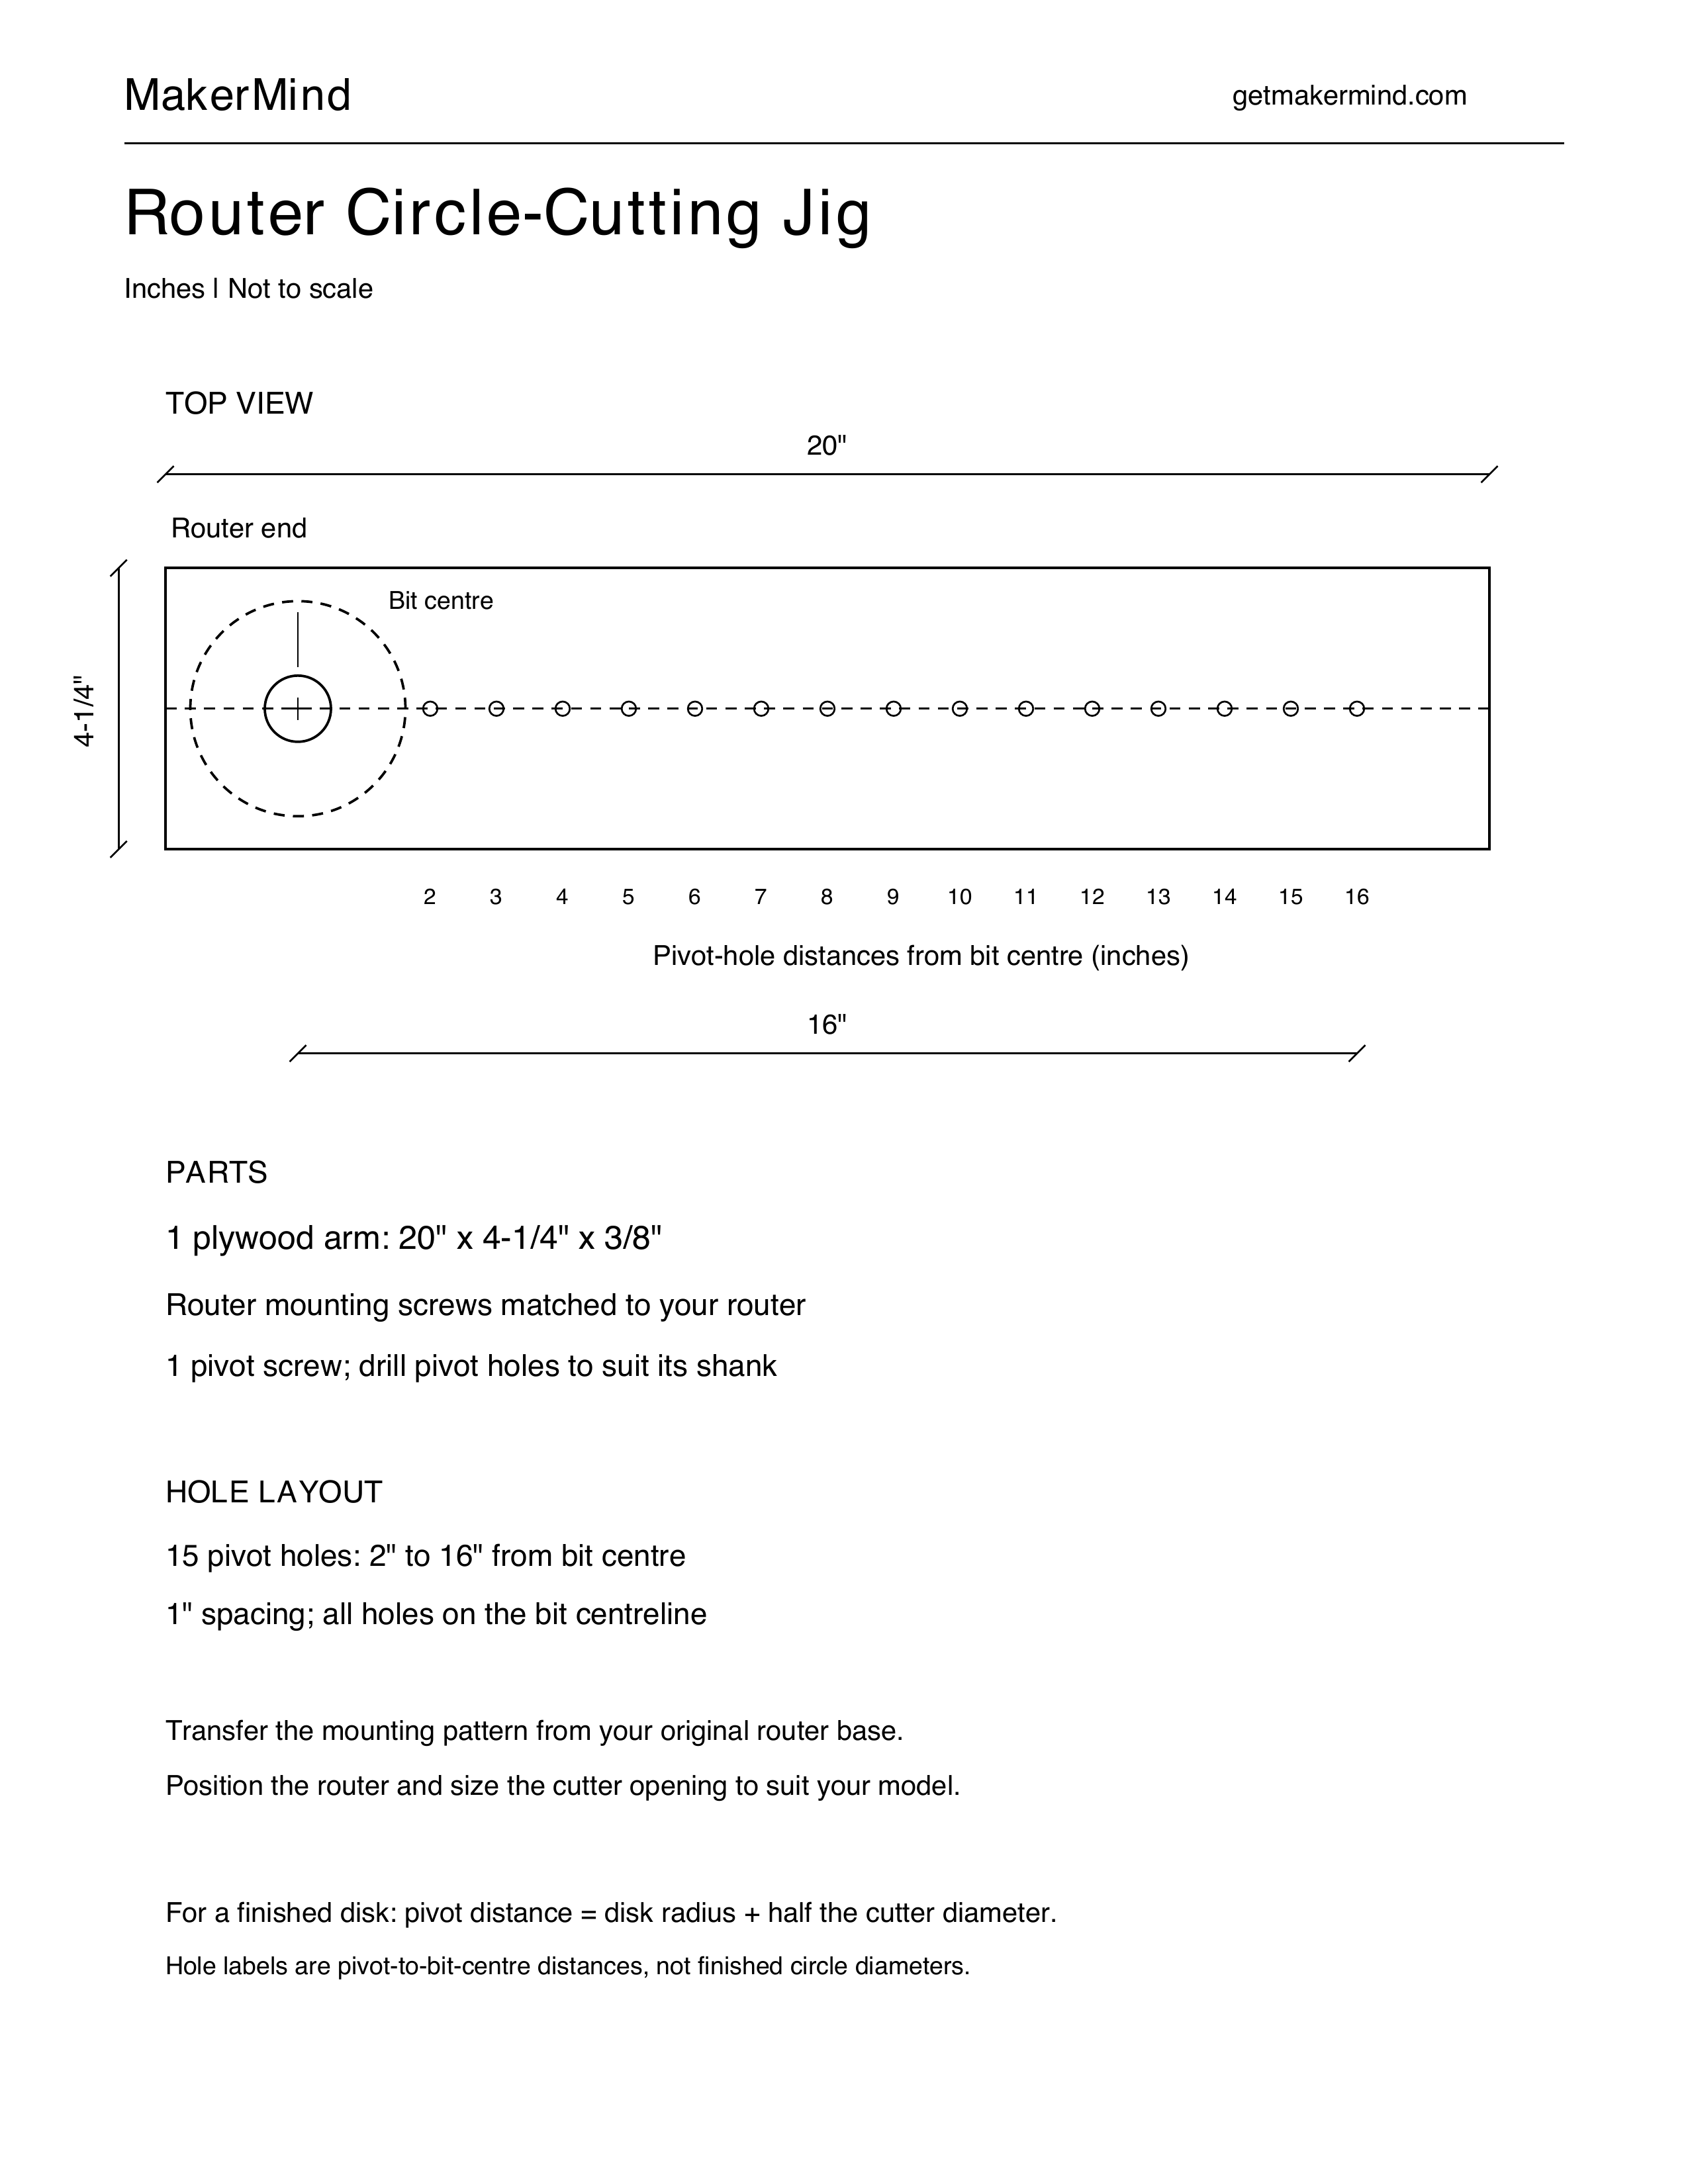
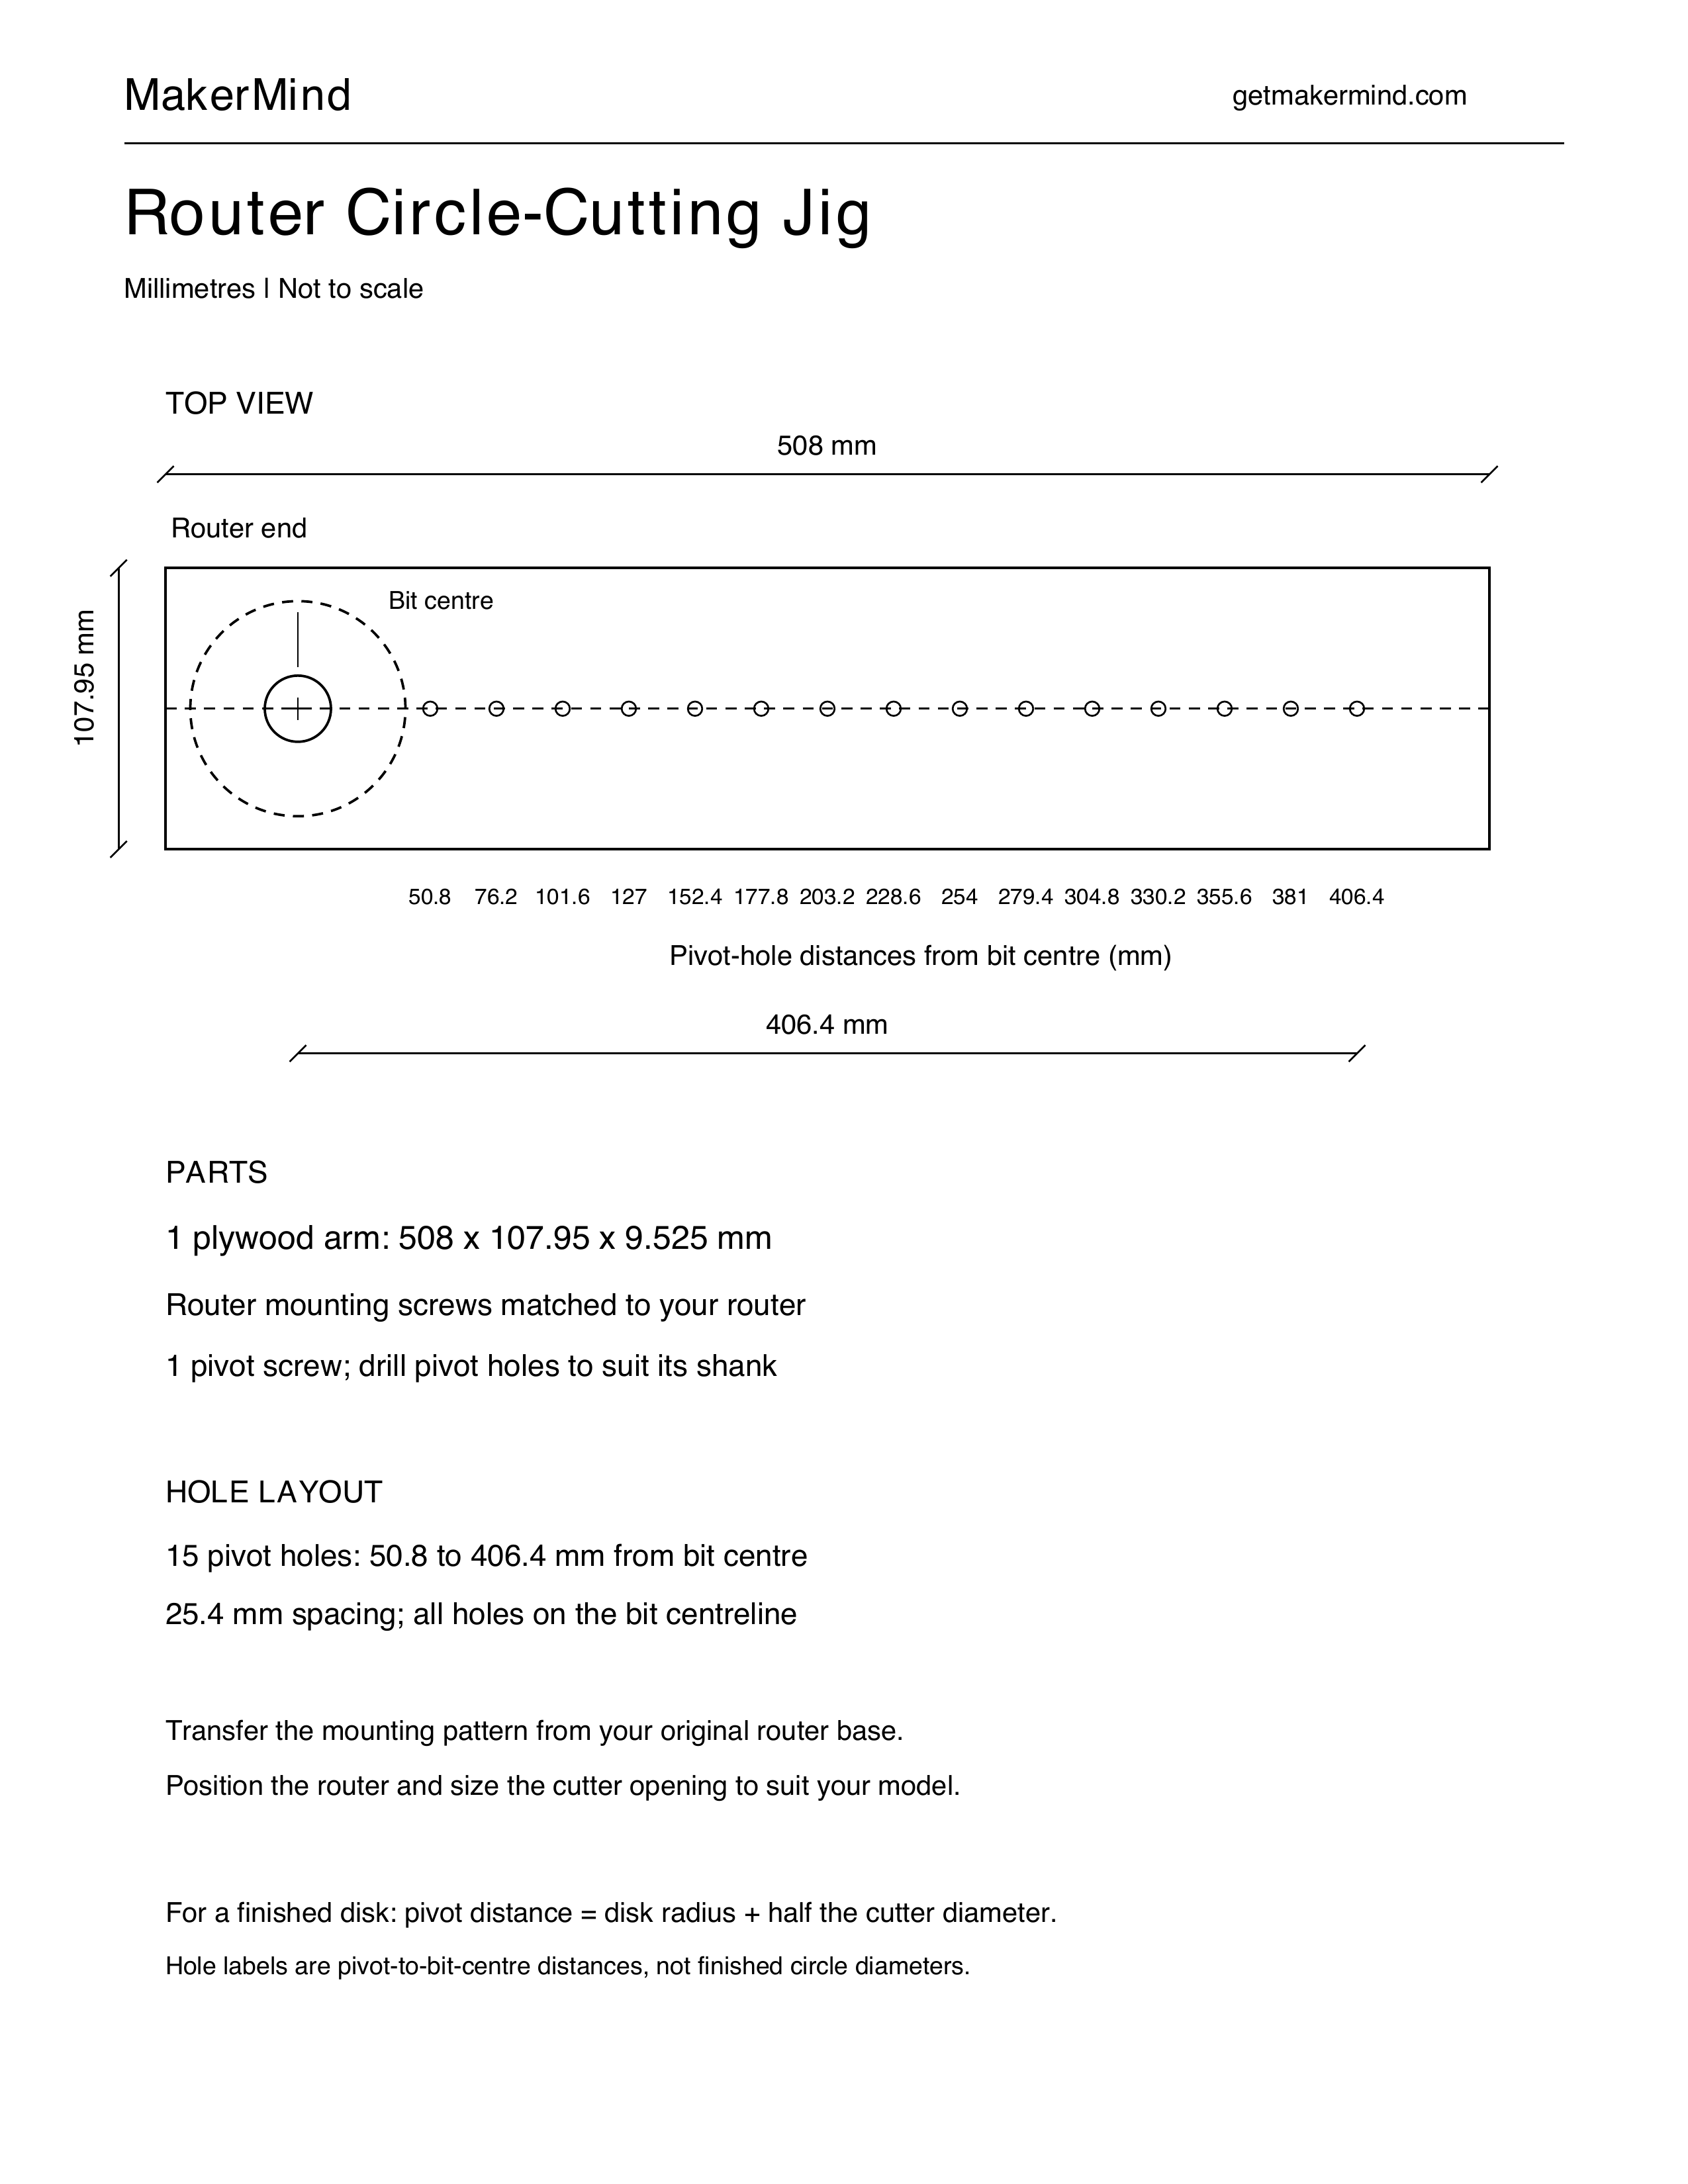
A simple 20-inch plywood arm that lets your router cut circles around a screw pivot. Includes 15 pivot holes at 1-inch intervals, from 2 to 16 inches from the bit centre. Transfer the mounting-hole pattern from your own router base.
Woodworking · Intermediate · 30–60 minutes
Tools
- Saw
- Router and suitable straight-cutting bit
- Drill and drill bits
- Ruler
- Square
- Countersink
- Pencil
Materials
- 3/8-inch plywood
Hardware
- Mounting screws matched to your router, with heads flush underneath
- 1 pivot screw
Cut list
- Plywood arm — 1 × 20 in x 4-1/4 in x 3/8 in Plywood
Diagrams
Build steps
Cut the arm
• Cut the plywood to 20″ × 4¼″. Keep it flat and sand off splinters.
Fit the router
• Disconnect the router’s power. Remove its original base plate and use it to transfer the mounting holes and cutter opening onto one end of the plywood. The mounting-hole pattern must match your router. Drill the mounting holes and countersink underneath so screw heads sit flush. Make the cutter opening large enough for clearance, then attach the arm securely with suitable screws matched to your router.
Mark the pivot holes
• Draw a centreline through the bit centre along the arm. Mark holes every 1″, starting 2″ from the bit centre and continuing through 16″—15 holes total.
Drill and label
• Drill the pivot holes to suit your screw’s shank. Label each with its distance from the bit centre. The arm should rotate smoothly around the screw without sideways play.
Cut a circle
• Secure the workpiece on a sacrificial backing board and mark the circle centre. Select a pivot hole and fasten the pivot screw at that mark without locking the arm in place. Set up a suitable starting method for your router and make several shallow passes in the manufacturer’s recommended feed direction. Secure both the disk and surrounding waste before cutting through. • For a finished wooden disk, pivot-to-bit-centre distance equals the desired radius plus half the cutter diameter. Test on scrap first.
Safety notes
- Disconnect power before adjustments. Wear eye and hearing protection, keep clamps clear of the router’s path, and keep hands away from the cutter.
- Read the entire project plan and confirm all measurements, material sizes, and tool setups before beginning any cuts or assembly.
- Always follow manufacturer safety instructions and use proper safety equipment such as push sticks, guards, clamps, and stable work supports.
- Never operate tools while fatigued, distracted, or under the influence, and seek supervision or assistance when using unfamiliar tools or techniques.
- MakerMind provides informational project guidance only; users are responsible for safe tool operation, verifying measurements, and maintaining a safe workshop environment.
Common mistakes to avoid
Router mounting screws do not fit
Why it happens: The mounting pattern, screw thread or screw length does not match the router.
How to avoid: Transfer the holes from your original base plate. Use screws matched to your router and plywood thickness. Countersink underneath so heads sit flush, and check that screws engage securely without bottoming out.
Measuring from the end of the arm
Why it happens: Pivot positions are measured from the plywood end instead of the bit centre.
How to avoid: Measure every pivot position from the bit centre. Mark 15 holes at 1-inch intervals, starting at 2 inches and ending at 16 inches.
Wrong finished circle size
Why it happens: Pivot labels are mistaken for finished radii or diameters without allowing for cutter width.
How to avoid: For a finished wooden disk, pivot-to-bit-centre distance equals the desired radius plus half the cutter diameter. Test on scrap before cutting the final workpiece.
Pivot too tight or too loose
Why it happens: The screw locks the arm down or allows sideways movement.
How to avoid: Size the jig hole to the screw shank. Anchor the screw securely while allowing smooth rotation without sideways play. Check the fit with the router disconnected.
Workpiece moves during the final pass
Why it happens: The disk or surrounding waste becomes loose as the cut breaks through.
How to avoid: Secure both the disk and surrounding waste to a sacrificial backing board. Keep clamps and fasteners clear of the cutter path and make several shallow passes.
Finishing suggestions
- Leave unfinished. Sand off splinters and keep the underside flat with screw heads flush.