Simple Sanding Disc Holder
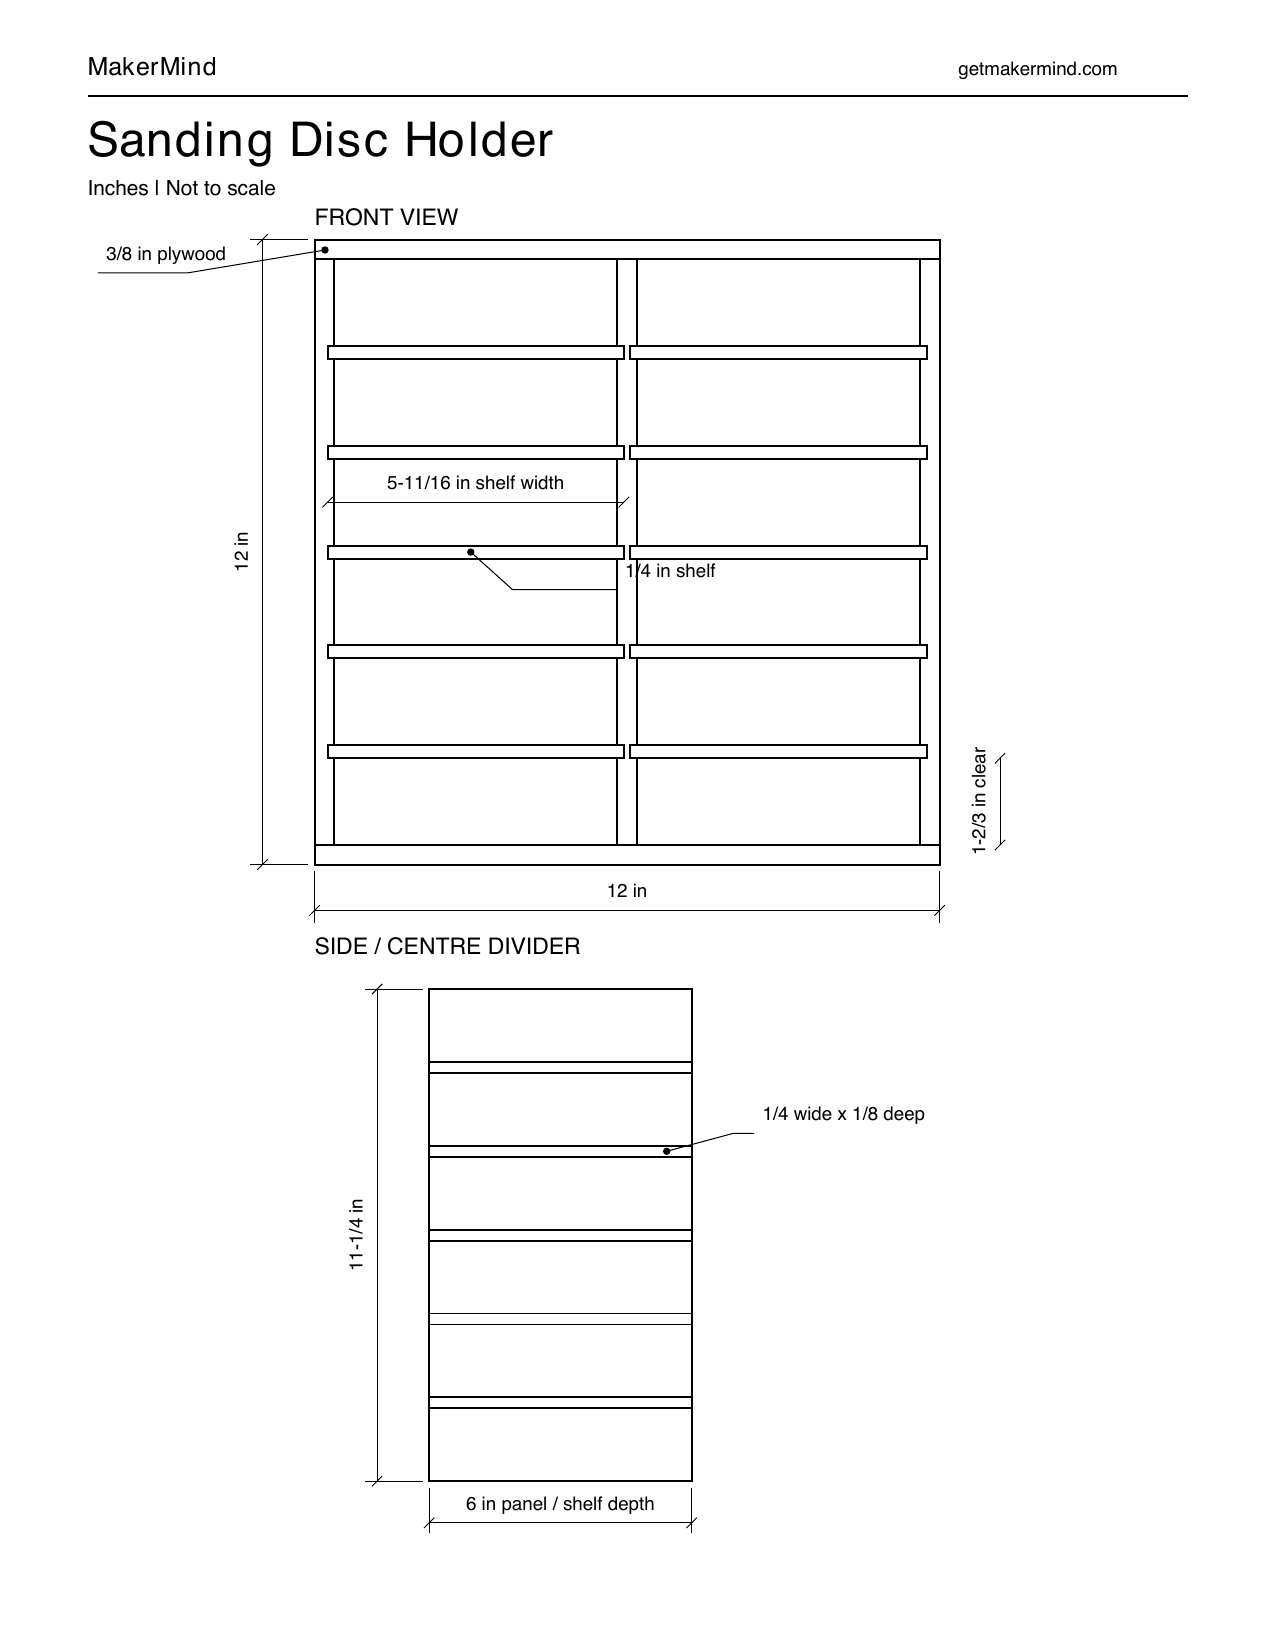
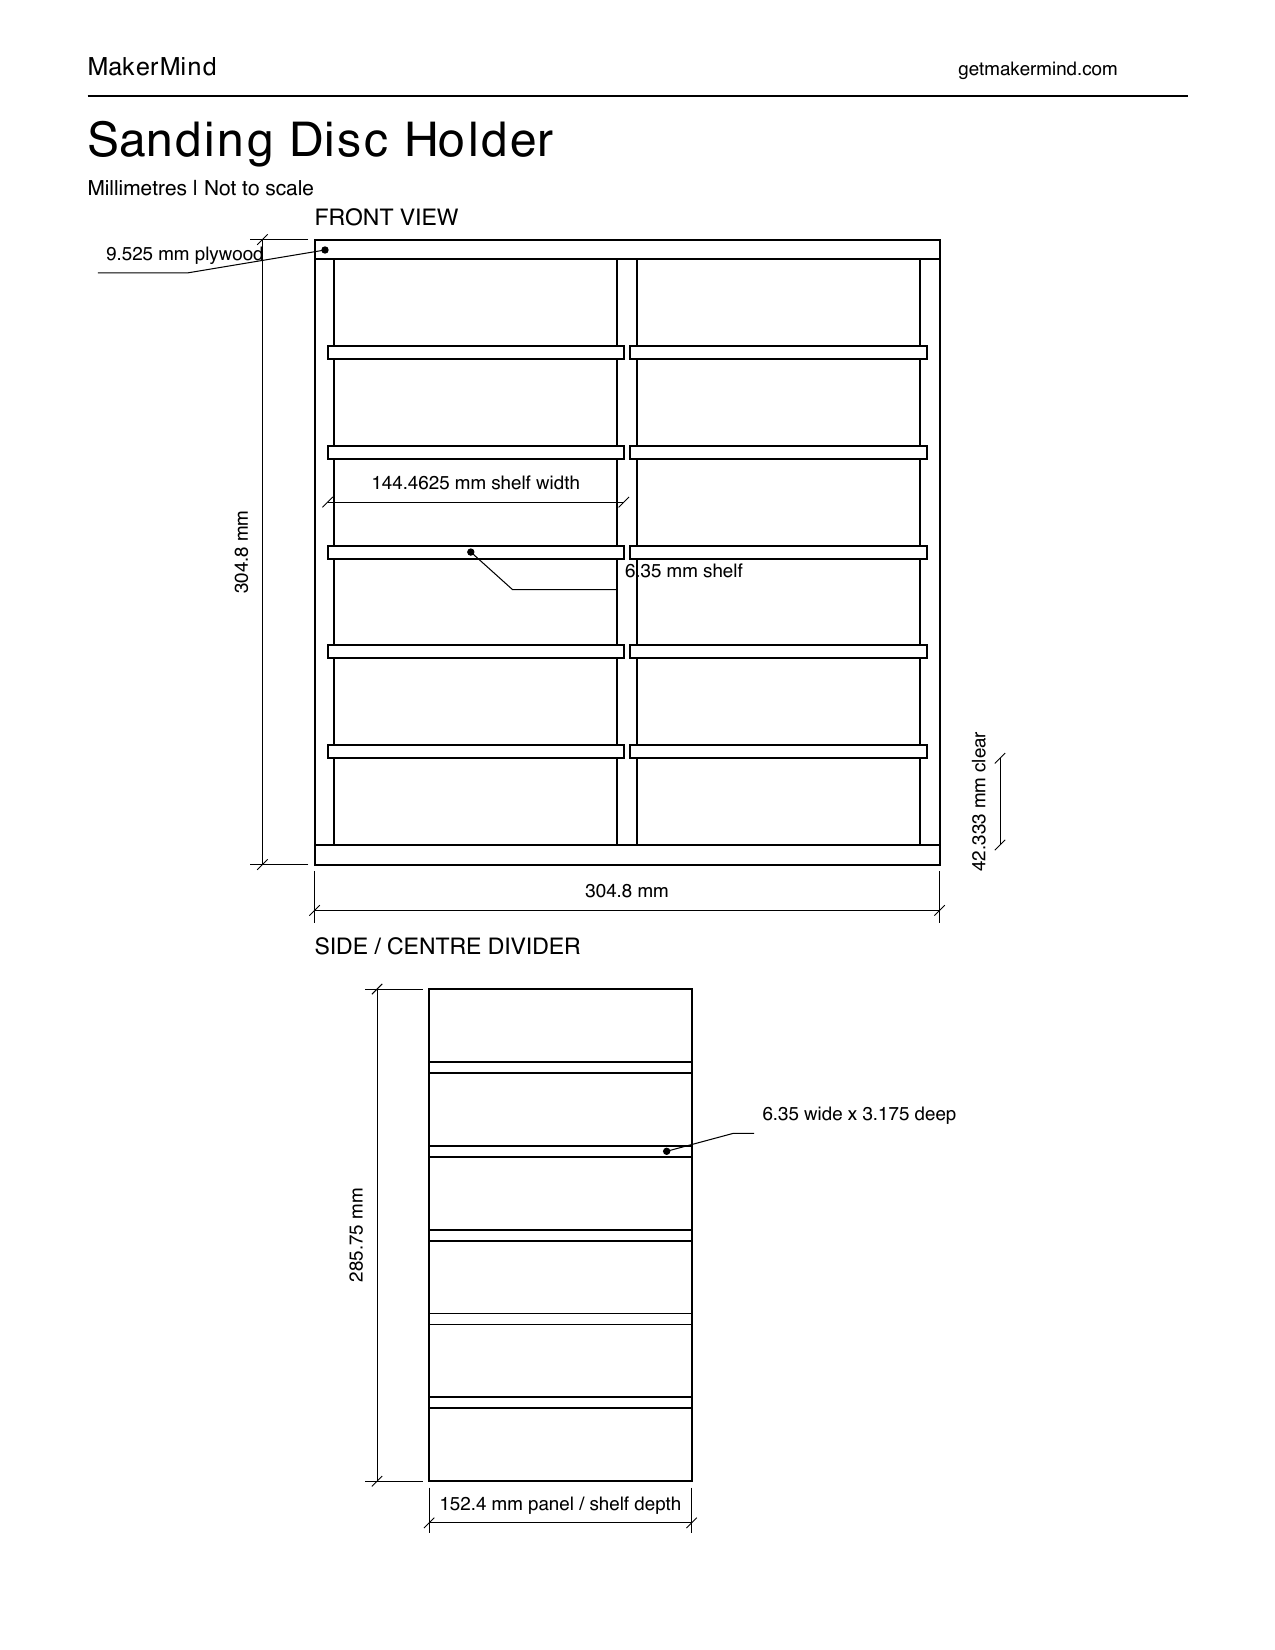
Keep sanding discs organized in twelve compartments. This plywood holder measures 12 inches wide x 12 inches tall x 6-3/8 inches deep, with ten fixed shelves seated in dados and an applied back.
Woodworking · Intermediate · 1–2 hours, plus glue curing
Tools
- Ruler or tape measure
- Square and pencil
- Table saw
- Brad nailer
- Clamps
- Sandpaper
- Miter saw
Materials
- 3/8-inch plywood for case and back; 1/4-inch plywood for shelves
Hardware
- 5/8-inch brad nails
- Wood glue
- Sandpaper
Cut list
- Top and bottom — 2 × 12 x 6 x 3/8 in Plywood
- Sides and centre divider — 3 × 11-1/4 x 6 x 3/8 in Plywood
- Shelves — 10 × 5-11/16 in wide x 6 in deep x 1/4 in thick Plywood
- Back — 1 × 12 x 12 x 3/8 in Plywood
Diagrams
Build steps
Cut the parts
• Cut the plywood parts to size. Test-fit one shelf before cutting all ten; actual plywood thickness can affect the required shelf width.
Cut the dados
• Mark five shelf positions to create six equal openings, approximately 1-2/3 inches high. • Cut matching dados on the inside of each side panel and both faces of the centre divider. Make them 1/8 inch deep and match their width to the actual shelf thickness. • Use the same bottom reference edge for every piece. Test the setup on scrap and avoid cutting deeper than 1/8 inch, especially on the centre divider.
Assemble
• Dry-fit everything first. Apply wood glue to the dados and joints, fit the shelves between the sides and centre divider, then attach the top and bottom. • Clamp the assembly square and secure the top and bottom to the uprights with 5/8-inch brad nails.
Attach the back
• Check that the cabinet is square, then glue and brad-nail the 12 x 12-inch back onto the rear edges. Keep the brads centred in the plywood edges.
Sand and finish
• Remove excess glue and sand rough edges smooth. Leave unfinished or apply a clear finish if desired. Let the glue and any finish cure before loading the compartments.
Safety notes
- Wear safety glasses, hearing protection, and appropriate respiratory protection when cutting, sanding, routing, or machining materials.
- Read the entire project plan and confirm all measurements, material sizes, and tool setups before beginning any cuts or assembly.
- Always follow manufacturer safety instructions and use proper safety equipment such as push sticks, guards, clamps, and stable work supports.
- Never operate tools while fatigued, distracted, or under the influence, and seek supervision or assistance when using unfamiliar tools or techniques.
- MakerMind provides informational project guidance only; users are responsible for safe tool operation, verifying measurements, and maintaining a safe workshop environment.
Common mistakes to avoid
Shelves cut too narrow
Why it happens: Shelf width does not include the portion seated in each dado.
How to avoid: Use a nominal shelf width of 5-11/16 inches, including 1/8-inch engagement at each end. Test-fit one shelf before cutting all ten; actual plywood thickness affects the fit.
Shelf dados do not line up
Why it happens: Positions are measured from different reference edges or shelf thickness is omitted from the spacing.
How to avoid: Use the same bottom reference edge on every upright. Allow for five shelf thicknesses when dividing the remaining height into six equal openings. Cut matching dados on both faces of the centre divider.
Dados cut too deep
Why it happens: The cutting depth is not checked before machining both faces of the thin centre divider.
How to avoid: Test the setup on scrap and limit each dado to 1/8 inch deep. Opposing dados in the nominal 3/8-inch centre divider leave only 1/8 inch of material between them.
Back locks the cabinet out of square
Why it happens: The back is attached before the cabinet is squared.
How to avoid: Compare diagonal measurements and adjust the clamps until they match. Hold the cabinet square while gluing and brad-nailing the back. Keep brads centred in the plywood edges and hands clear of the nail path.
Finishing suggestions
- Leave unfinished or add an optional clear finish. Let glue and finish cure before use.