Simple Plywood Push Stick
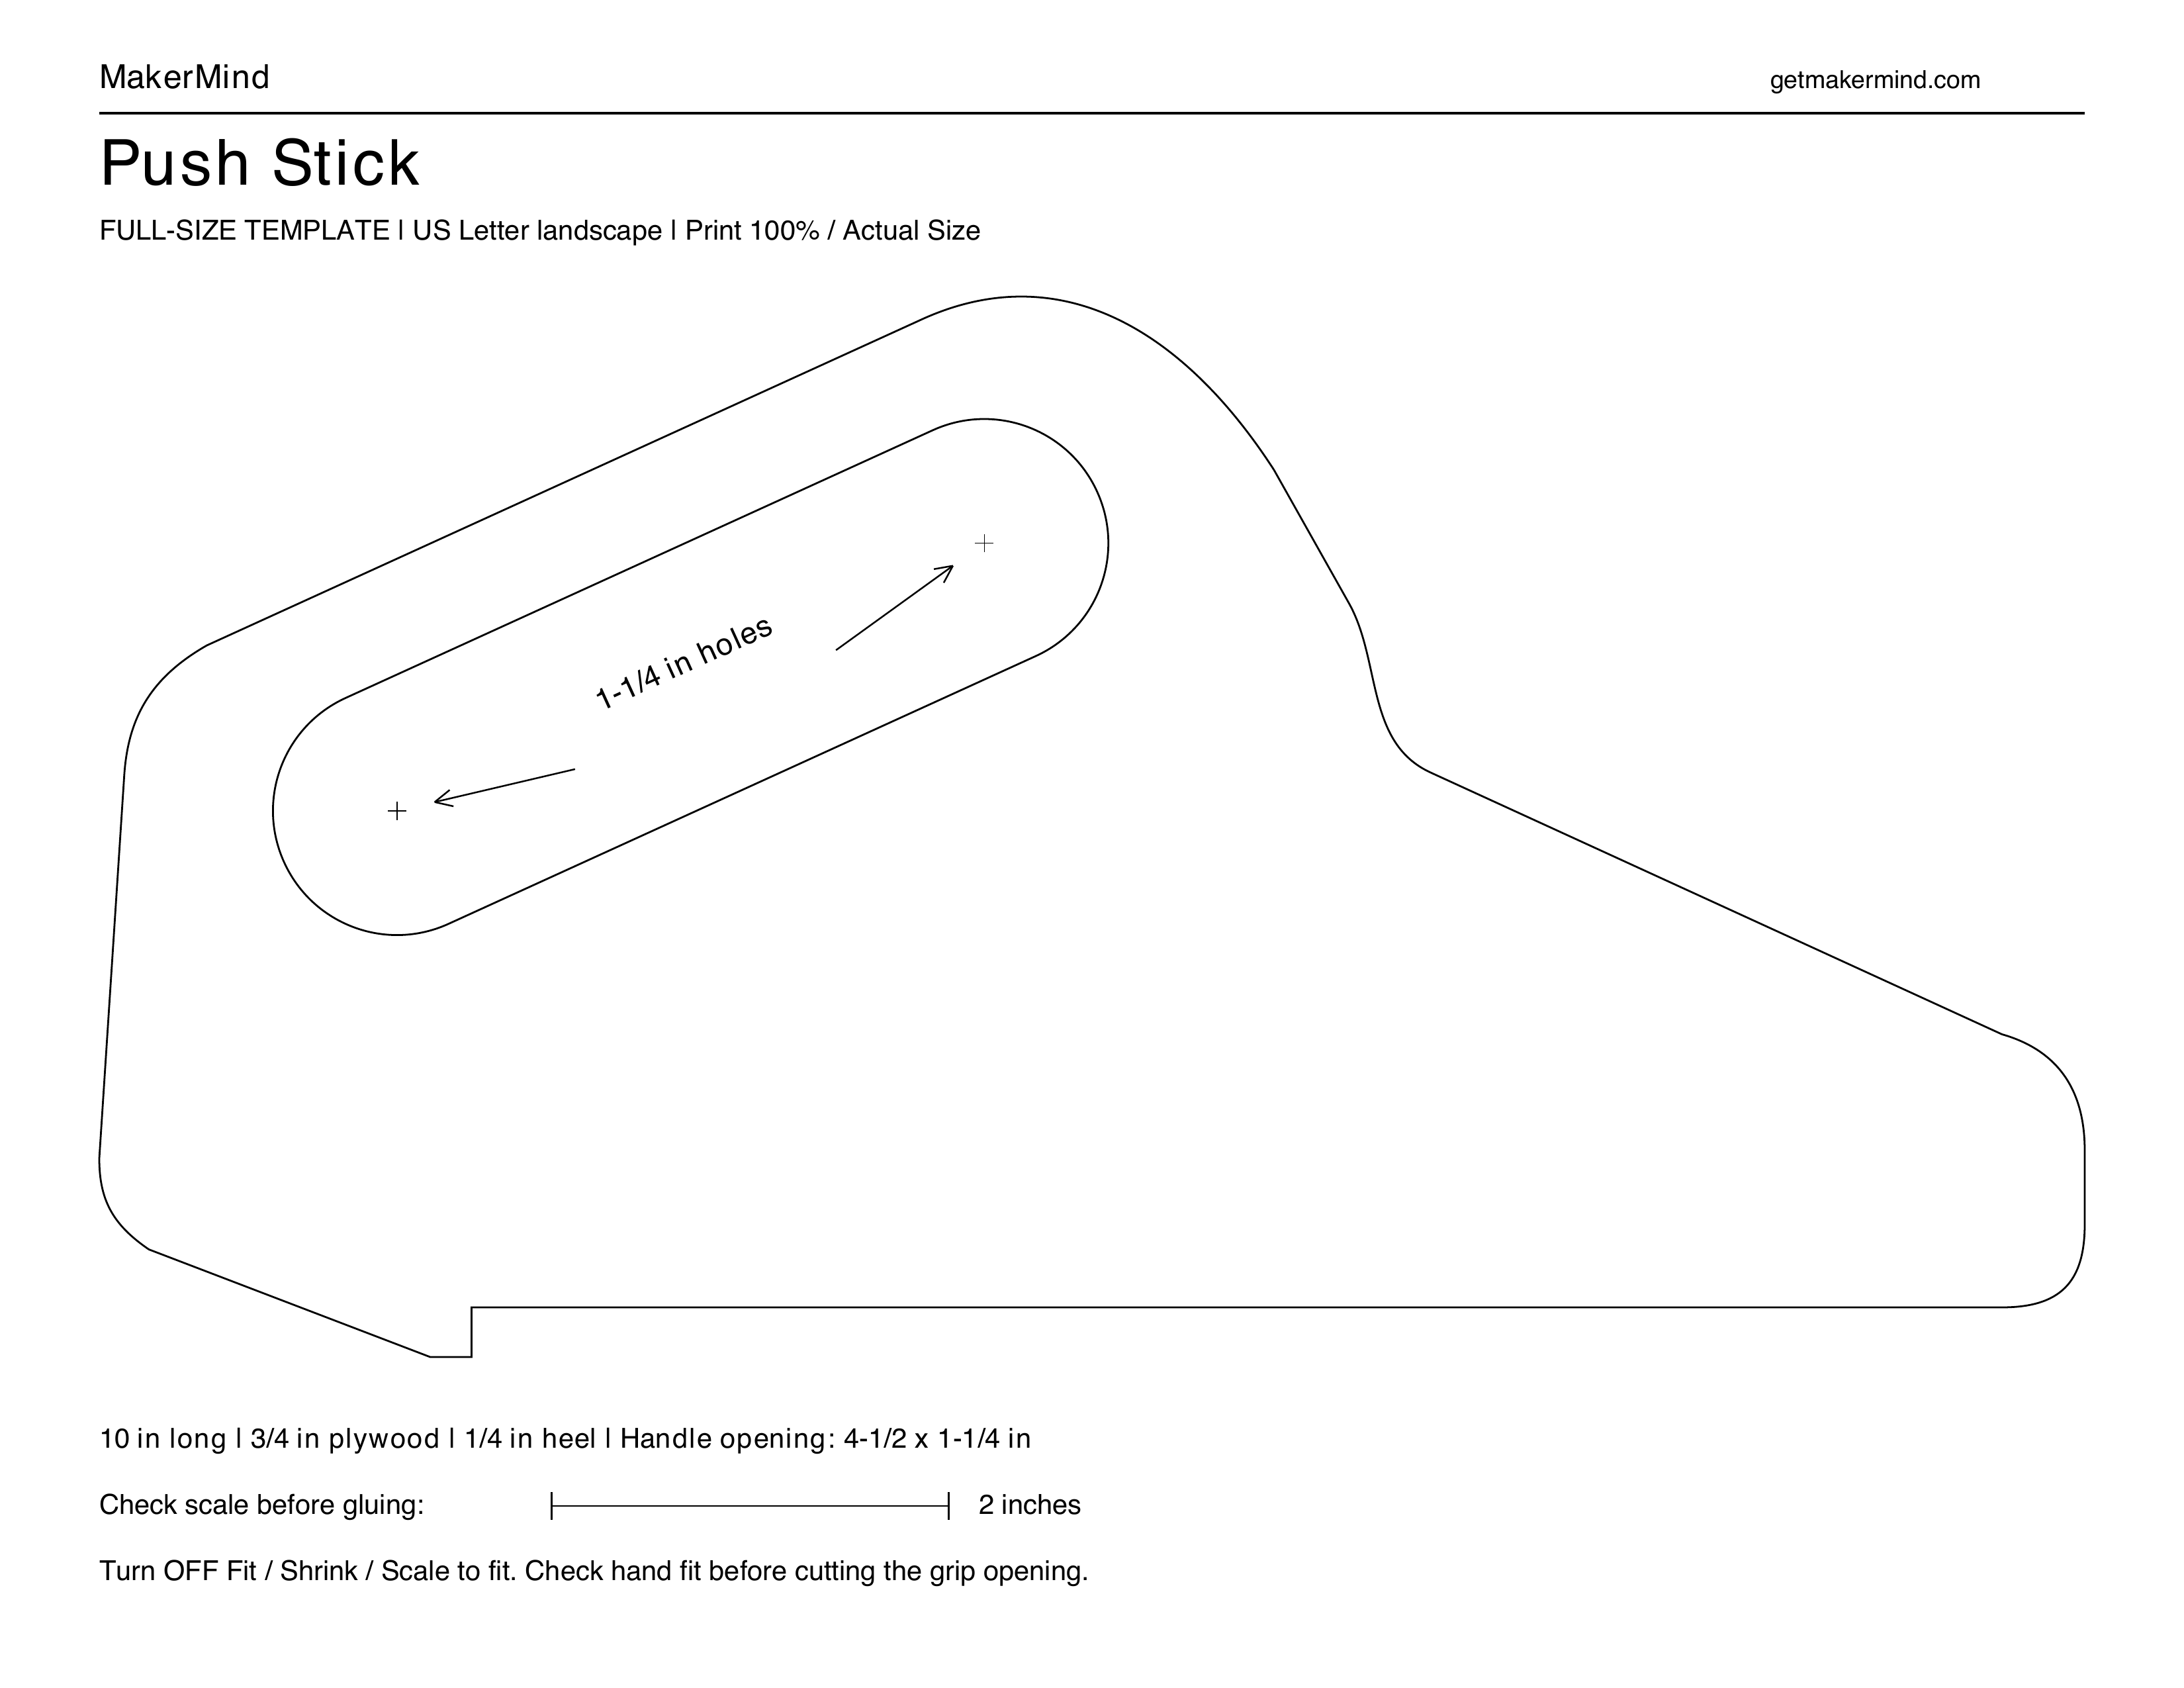
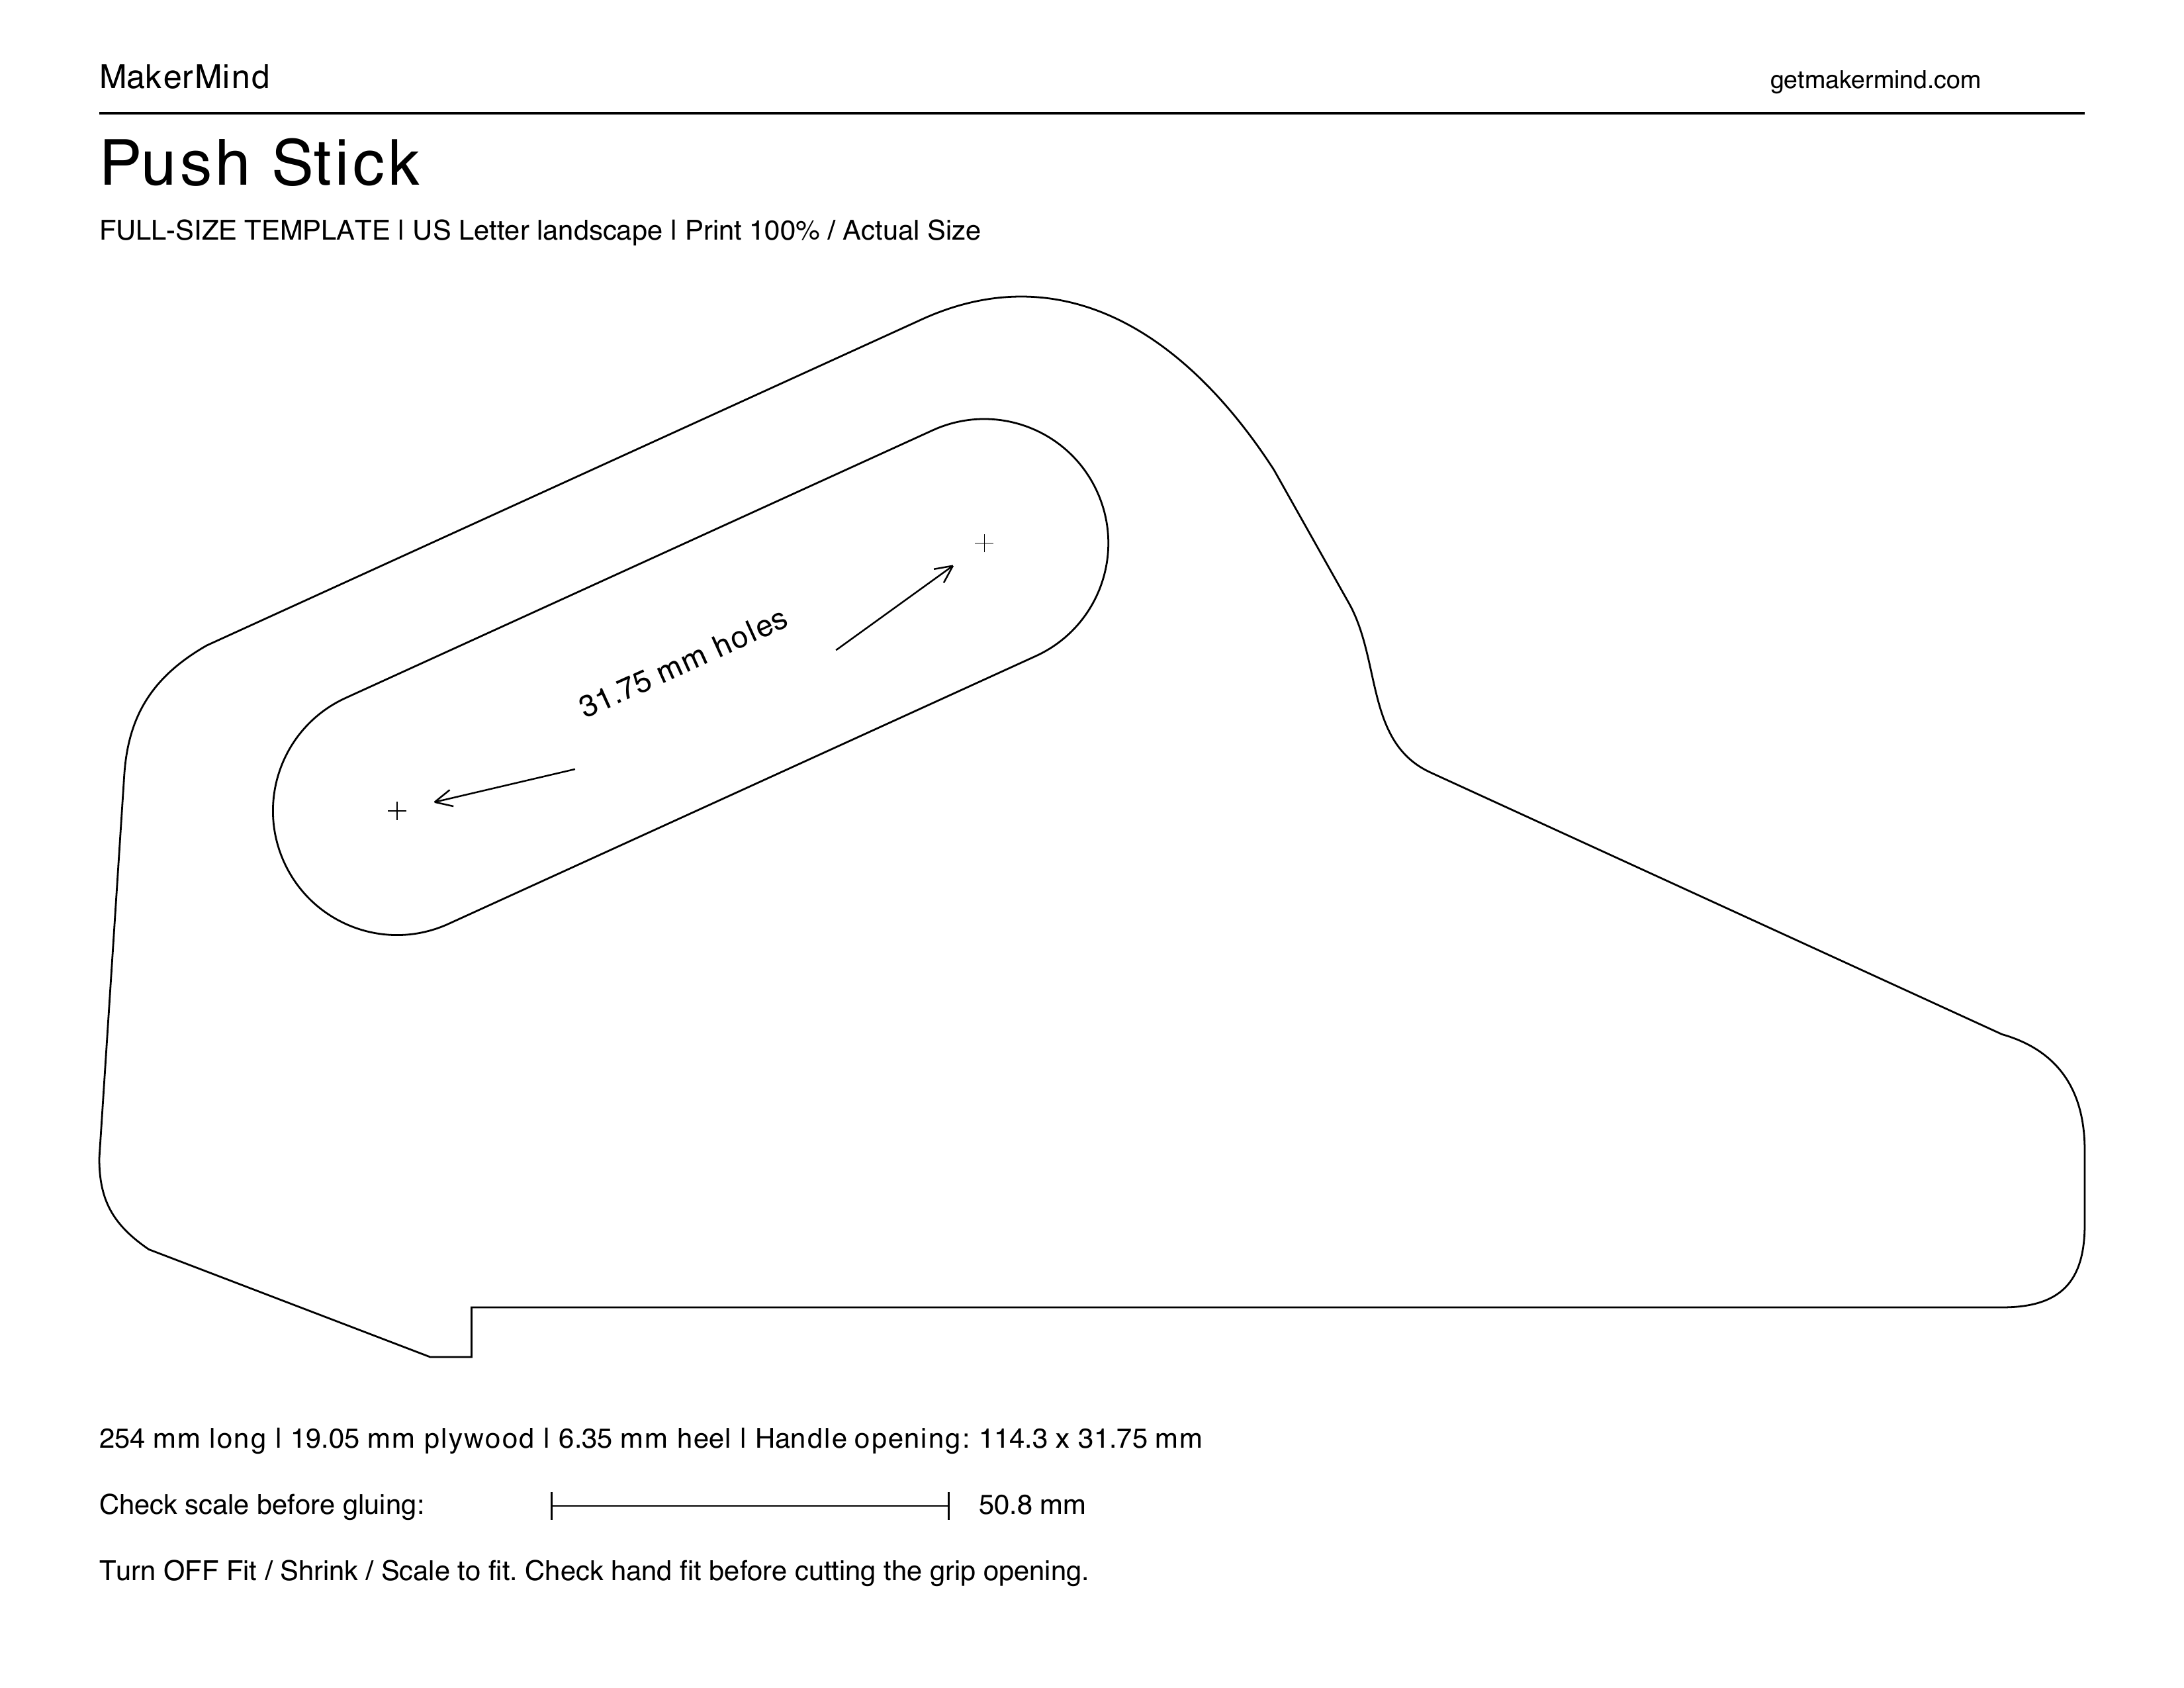
Make a push stick from 3/4-inch plywood using a full-size, single-page printable template. The 10-inch profile includes a 1/4-inch rear heel and a larger 4-1/2-inch-long by 1-1/4-inch-wide handle opening.
Woodworking · Beginner · 30 minutes
Tools
- Ruler for checking the printed scale bar
- Drill with 1-1/4-inch bit
- Jigsaw; bandsaw optional for outside profile
- Clamps and scrap backing board
- Sandpaper
Materials
- Flat 3/4-inch plywood, free of voids near the handle and heel
Hardware
- Printed full-size paper template
- Glue stick or spray adhesive
Cut list
- Push stick blank — 1 × 11 in x 6 in x 3/4 in blank; finished profile 10 in long 3/4-inch plywood
Diagrams
Build steps
Attach the template
• Print at 100% / Actual Size and check the scale bar. Roughly cut the paper around the outside shape, then attach it to the plywood with a glue stick or spray adhesive.
Drill the handle
• Clamp the plywood over a scrap backing board. Drill a 1-1/4-inch hole at each marked X.
Cut the shape
• Cut the outside shape with a jigsaw or bandsaw. Use a jigsaw to connect the two handle holes along the template lines.
Sand the edges
• Remove the paper and sand the edges smooth. Add a rounded or chamfered edge to the grip if desired. Keep the bottom pushing surface flat and the rear heel square—no edge profile on either.
Safety notes
- With the saw disconnected, check that the heel catches the workpiece securely and the handle fits comfortably. Use stock thicker than the 1/4-inch heel, follow your saw’s instructions, and replace the push stick if damaged.
- Read the entire project plan and confirm all measurements, material sizes, and tool setups before beginning any cuts or assembly.
- Always follow manufacturer safety instructions and use proper safety equipment such as push sticks, guards, clamps, and stable work supports.
- Never operate tools while fatigued, distracted, or under the influence, and seek supervision or assistance when using unfamiliar tools or techniques.
- MakerMind provides informational project guidance only; users are responsible for safe tool operation, verifying measurements, and maintaining a safe workshop environment.
Common mistakes to avoid
Template printed at the wrong size
Why it happens: The printer scales the template to fit the page.
How to avoid: Print on US Letter paper in landscape at 100% / Actual Size. Turn off Fit or Shrink and measure the scale bar before gluing.
Handle holes drilled off centre
Why it happens: The drill bit starts away from a marked centre or the plywood moves.
How to avoid: Clamp the plywood over a scrap backing board. Place the centre point of the 1-1/4-inch bit directly on each marked X before drilling.
Plywood breaks near the grip or heel
Why it happens: Voids, delamination or cuts inside the outline weaken the narrow areas.
How to avoid: Use sound plywood and keep cuts just outside the outer profile line, then sand to it. Replace the push stick if the grip or heel is cracked or damaged.
Bottom pushing surfaces rounded over
Why it happens: The edge profile is continued around the sole and rear heel.
How to avoid: Round or chamfer the grip edges only. Keep the bottom pushing surface flat and the rear heel square so it catches the workpiece securely.
Finishing suggestions
- Sand smooth. An optional roundover or chamfer may be added to the grip only. Keep the sole flat and rear heel square.