Traditional Laminated Maple Mallet with Walnut Through-Handle
An intermediate woodworking mallet with a laminated maple head, walnut through-handle, angled striking faces, and two maple wedges. The head is built from two full-length outer laminations and two shorter center laminations that create the handle opening during glue-up.
Shop Projects · Intermediate · 4–6 hours plus glue and finish drying time
Tools
- Tape Measure
- Combination Square
- Pencil
- Table Saw
- Miter Saw
- Trim Router
- 3/8 in Roundover Bit
- Random Orbital Sander
- Block Plane
- Chisel Set
- Mallet
- Clamps
- Handsaw or Bandsaw
Cut list
- Head outer lamination – left — 1 × 5.75 in x 3.5 in x 7/8 in Maple
- Head outer lamination – right — 1 × 5.75 in x 3.5 in x 7/8 in Maple
- Head center lamination – front spacer — 1 × 2.25 in x 3.5 in x 7/8 in Maple
- Head center lamination – rear spacer — 1 × 2.25 in x 3.5 in x 7/8 in Maple
- Handle blank — 1 × 12 in x 1.25 in x 7/8 in Walnut
- Wedge – left kerf — 1 × 1.5 in x 7/8 in x 1/8 in Maple
- Wedge – right kerf — 1 × 1.5 in x 7/8 in x 1/8 in Maple
Diagrams
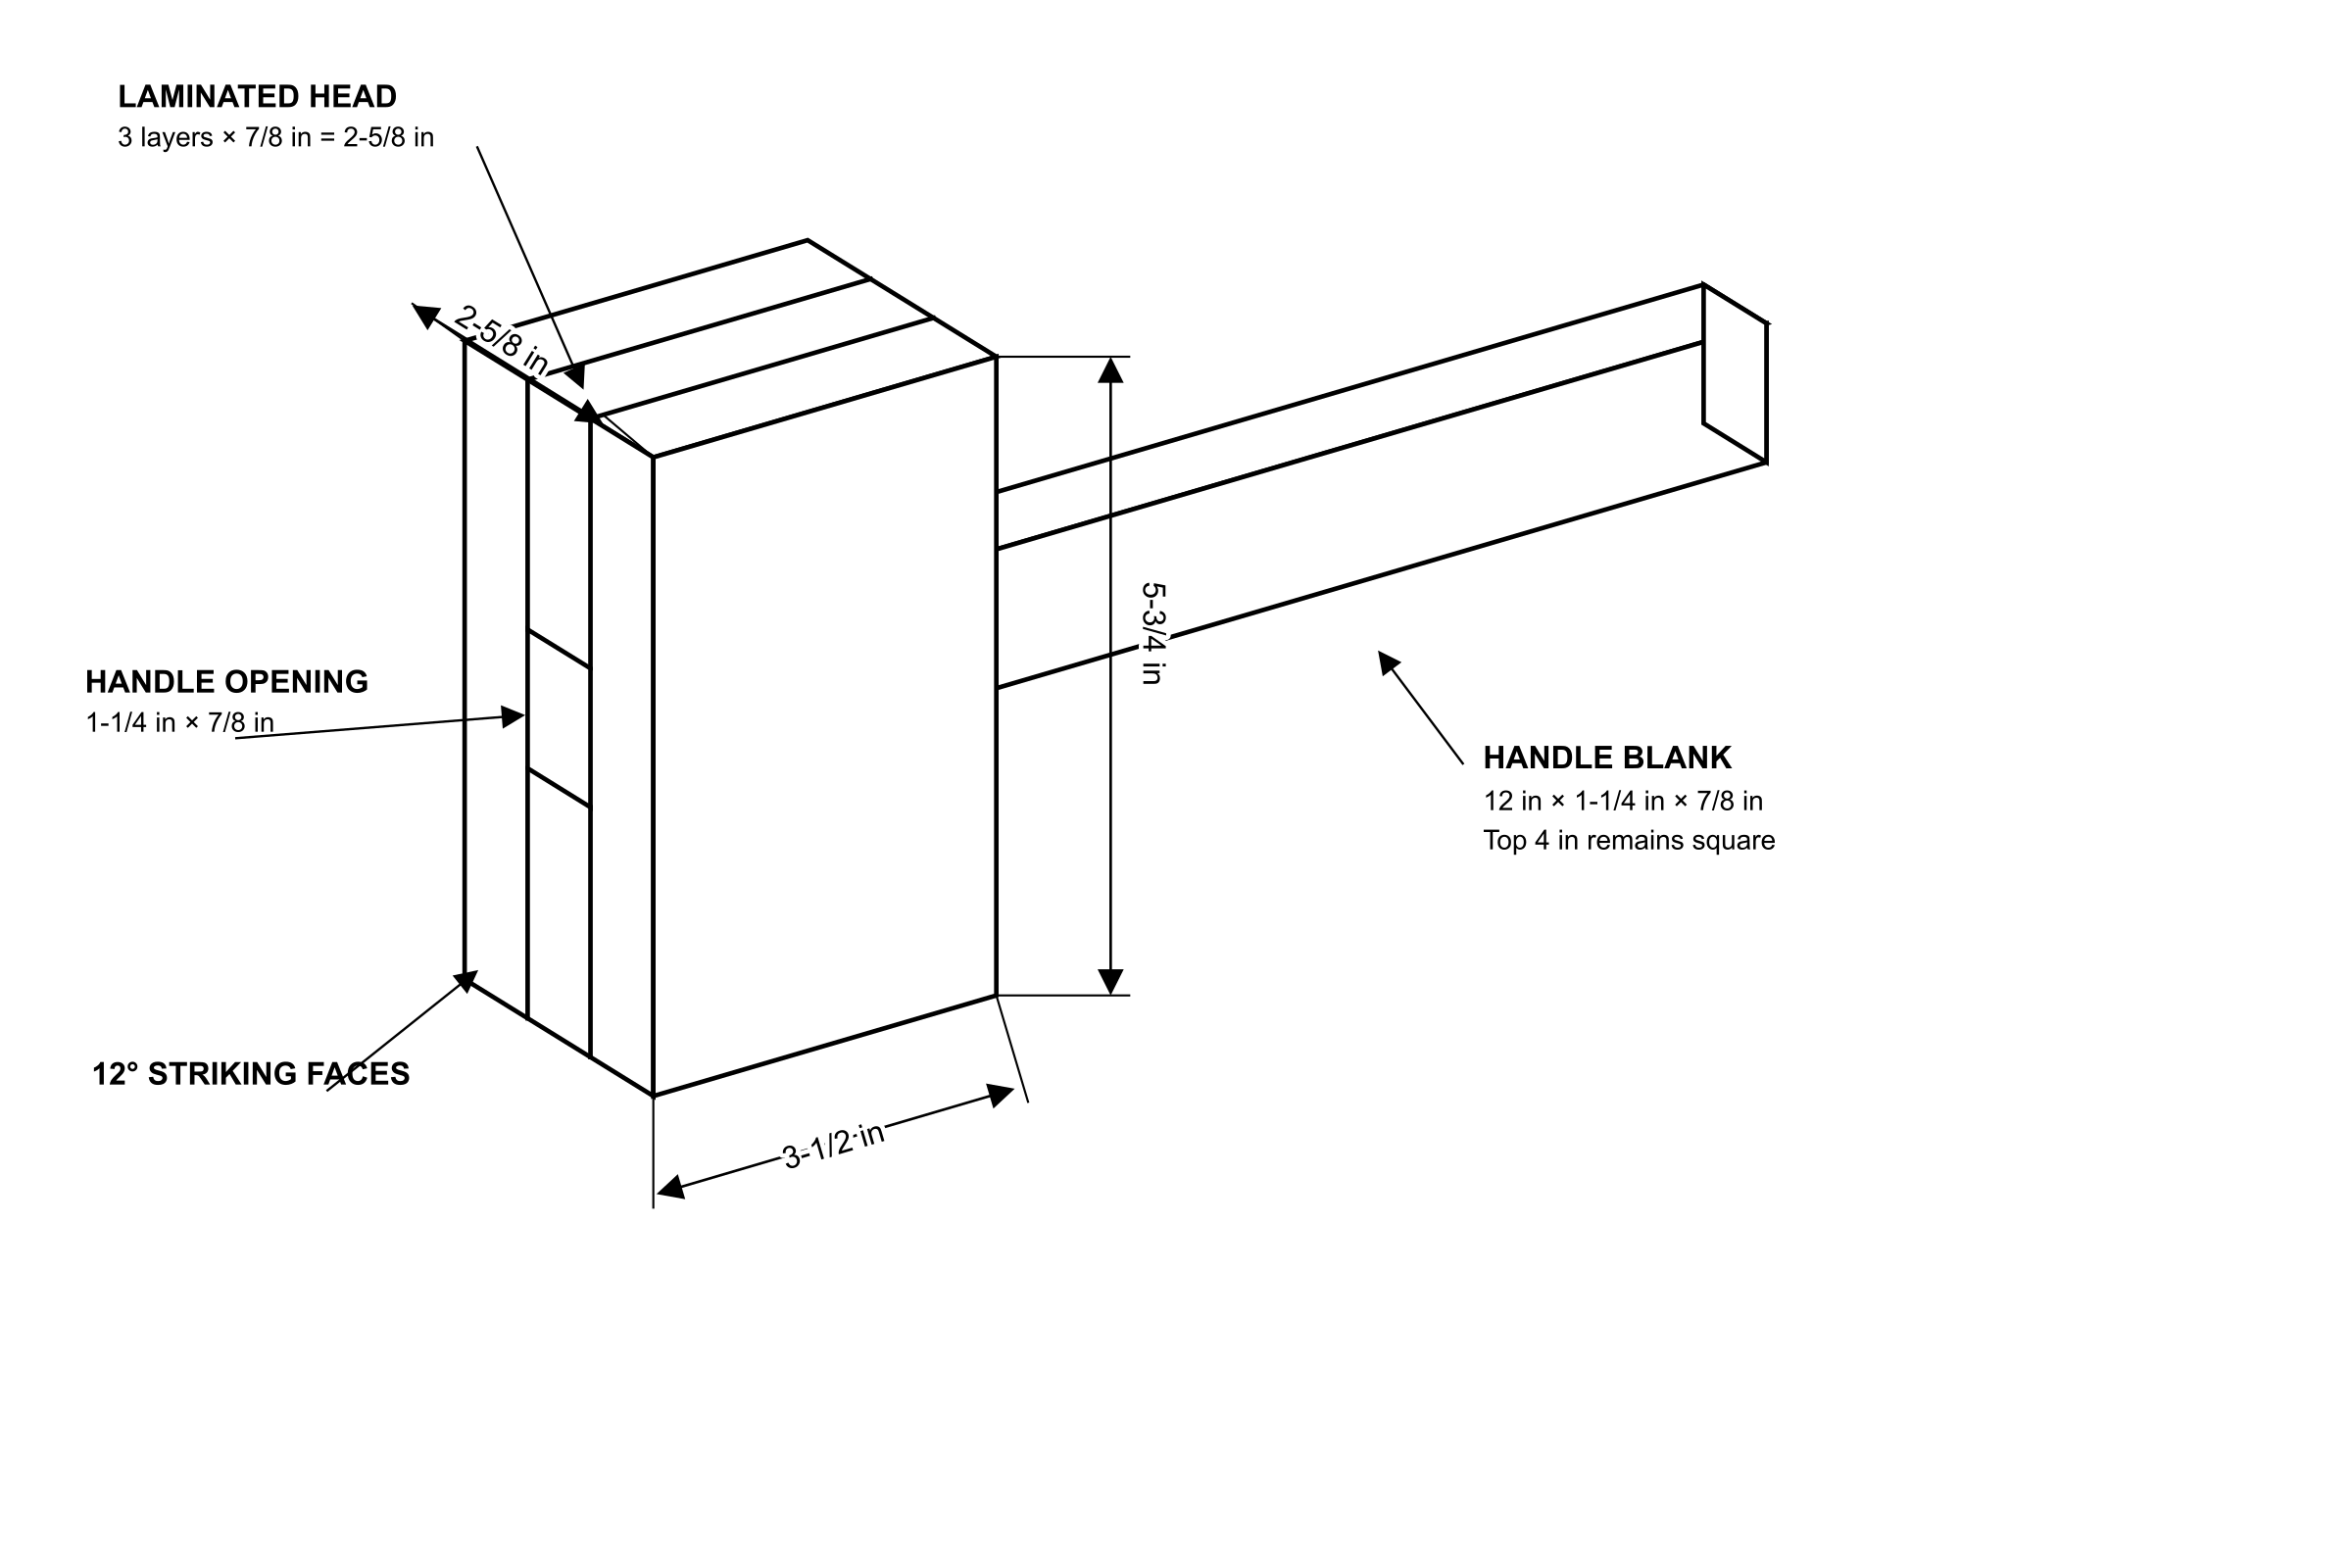
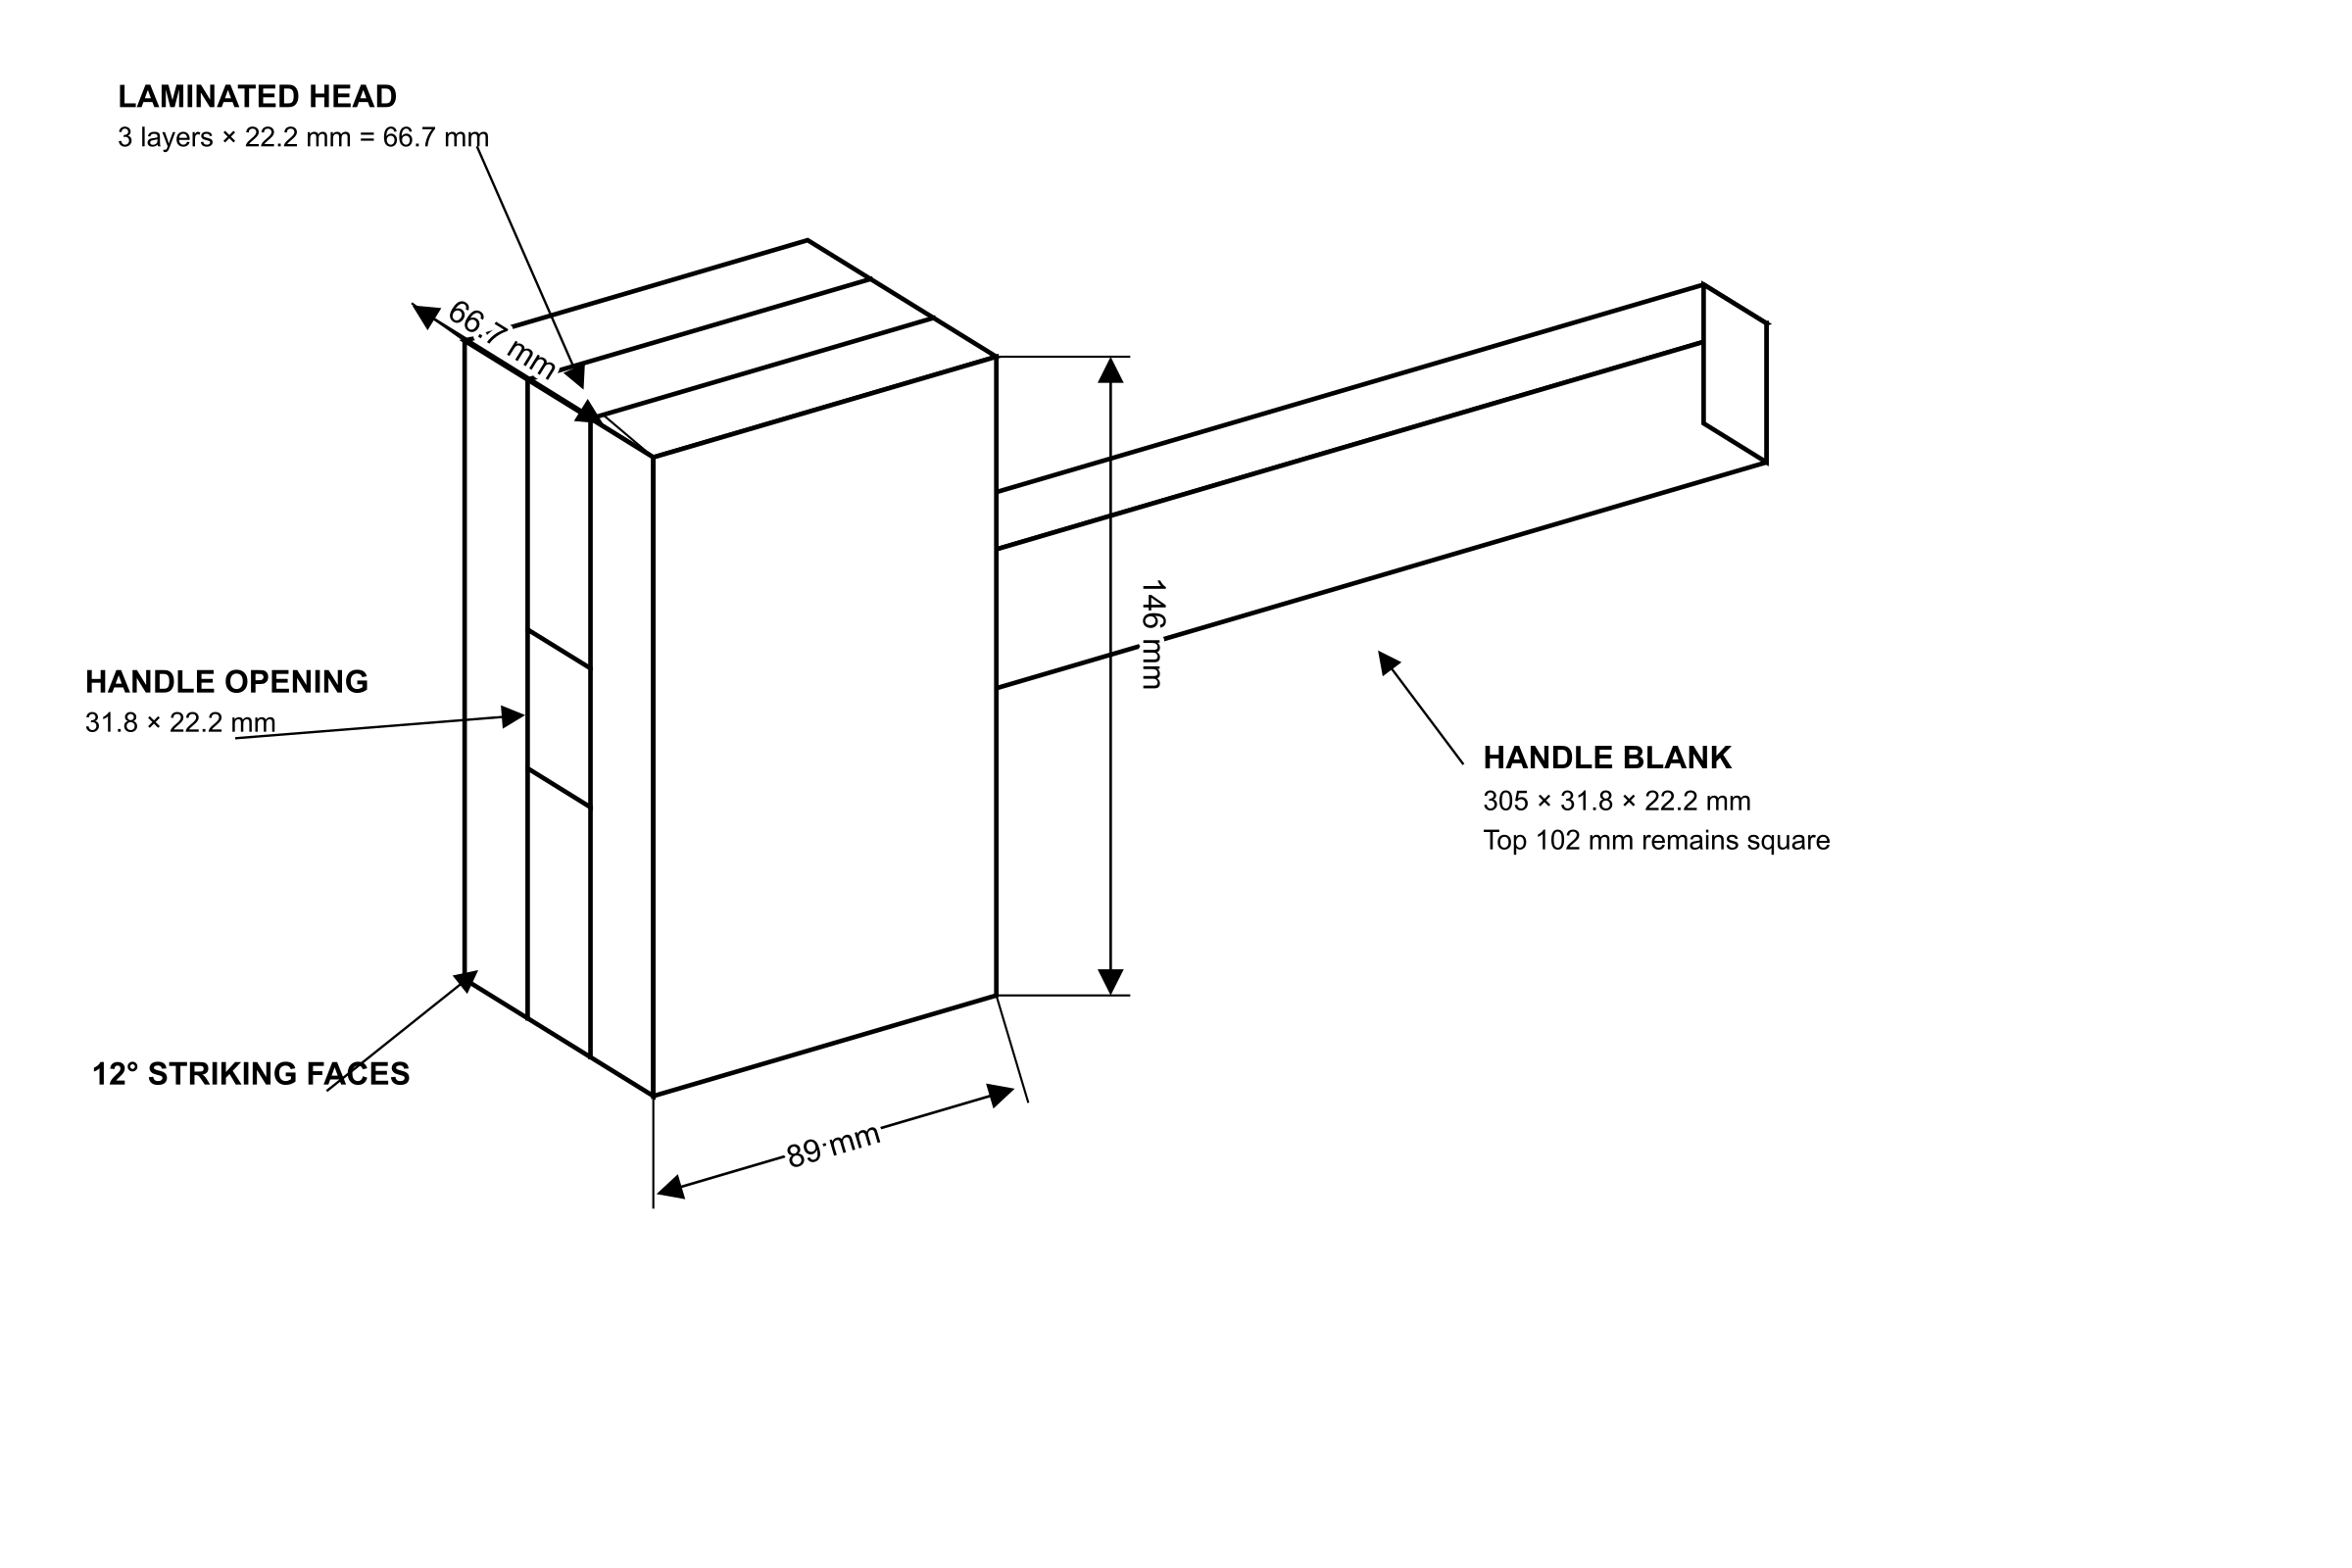
Build steps
Prep: Mill, Inspect, and Mark Reference Faces
1. Confirm all maple and walnut parts are a true 7/8 in thick from end to end. 2. Make sure the walnut handle blank has straight grain along its 12 in length. 3. Check that the maple laminations are flat and free from twist. 4. Mark the best grain faces on the maple laminations so they remain visible after glue-up. 5. Mark reference faces and edges with pencil before cutting.
Layout: Define the Laminated Head Opening
1. On both outer pieces, mark the full head outline and clearly identify the inside faces. 2. Lay the two 2.25 in center pieces between the outer pieces to create the handle opening during glue-up. 3. Use the walnut handle blank as a spacer to confirm the opening is 1.25 in wide and 7/8 in thick. 4. Keep the opening centered in the head from side to side. 5. Before moving on, check that the total stacked thickness is 2.625 in and that the assembly can be flushed after glue-up.
Cutting: Size All Parts Accurately
1. Cut the maple laminations to final length and height at the miter saw, keeping matching parts identical. 2. Trim the walnut handle blank to 12 in if needed, leaving both ends square for layout. 3. Cut the two maple wedges slightly oversized first, then bring them to 1.5 in long after tapering. 4. Make sure every glue edge is clean and square. 5. Test stack the parts before glue-up.
Assembly: Glue Up the Laminated Head
1. Apply glue to the mating faces only and keep glue out of the handle opening. 2. Clamp the stack with the two short center laminations captured between the full outer laminations. 3. Use the combination square to confirm the top and bottom edges are aligned. 4. Check that the handle opening is still the correct size before the glue sets. 5. Confirm the two middle pieces did not shift under clamp pressure. 6. Let the glue cure fully before moving on.
Refinement: Square and Angle the Head Blank
1. Flush the glued head until the block is a clean 5.75 in x 3.5 in x 2.625 in. 2. Mark matching 12 degree angles on both ends. 3. Make sure both angles are marked in the same orientation. 4. Cut the angled faces carefully at the miter saw only if your setup safely supports the block. 5. Keep hands clear of short angled cuts and use a clamp or hold-down. 6. Leave final edge treatment until after handle assembly and sanding.
Layout: Fit the Square Handle Section
1. Mark the top 4 in of the walnut blank as the square section that passes through the head. 2. Test the blank in the head opening and mark high spots with pencil. 3. Use a block plane or chisel to remove small amounts evenly from the square section. 4. Re-test the fit often and avoid forcing the handle through the opening. 5. Make sure the handle shoulders seat cleanly against the bottom of the head and that the head stays square to the handle faces.
Joinery: Cut the Wedge Kerfs
1. Mark two evenly spaced kerfs centered across the 1.25 in handle width. 2. Leave solid wood at both outer edges of the handle. 3. Cut both kerfs from the top end of the handle using a bandsaw or handsaw while the upper section remains square. 4. Cut each kerf approximately 1.5 in deep. 5. Keep the kerfs parallel to the handle faces so the wedges spread the handle evenly inside the head. 6. Test that each wedge starts into its kerf by hand without splitting the walnut.
Shaping: Round Over the Grip and Refine the Handle
1. Mark a clear stop line 4 in down from the top so the square section remains untouched. 2. Use a trim router with a 3/8 in roundover bit on all four edges of the lower handle only. 3. Keep the roundover below the 4 in stop line so it does not affect the head fit. 4. Blend the transition from square to rounded with a block plane and sanding. 5. Slightly ease the bottom end of the grip for comfort. 6. Check the feel in hand before final sanding.
Assembly: Install the Handle and Drive the Wedges
1. Dry assemble first and make sure the handle protrudes enough above the head to accept the full wedge. 2. Apply glue to the square handle section inside the head and lightly in the kerfs. 3. Avoid excess glue that can hydraulic-lock the wedges. 4. Seat the head fully on the handle. 5. Drive both maple wedges evenly with light alternating hits. 6. Check that the head remains centered on the handle while driving the wedges. 7. Trim the proud wedge and handle material flush, or leave it about 1/16 in proud for a traditional look.
Finishing: Final Fairing, Sanding, and Surface Treatment
1. Sand the head and handle through 120, 180, and 220 grit. 2. Preserve the crisp shoulder where the handle meets the head. 3. Ease any remaining sharp corners on the head by hand so the edges resist chipping in use. 4. Check the striking faces for flatness and matching angles after sanding. 5. Apply a wipe-on oil, hardwax oil, or oil/varnish blend. 6. Allow the mallet to sit for 24 hours after finishing before heavy use.
Safety notes
- Wear safety glasses, hearing protection, and appropriate respiratory protection when cutting, sanding, routing, or machining materials.
- Read the entire project plan and confirm all measurements, material sizes, and tool setups before beginning any cuts or assembly.
- Always follow manufacturer safety instructions and use proper safety equipment such as push sticks, guards, clamps, and stable work supports.
- Never operate tools while fatigued, distracted, or under the influence, and seek supervision or assistance when using unfamiliar tools or techniques.
- Maker Mind provides informational project guidance only; users are responsible for safe tool operation, verifying measurements, and maintaining a safe workshop environment.
Finishing suggestions
- For a shop-ready feel, apply 2–3 light coats of wipe-on oil/varnish blend and de-nib between coats.
- For a drier grip, use a penetrating oil on the handle and leave the striking faces with only a minimal seal coat.
- For a traditional look, apply paste wax after the finish cures, but keep wax off the striking faces.
- Allow the mallet to sit for 24 hours after finishing before heavy use.